Get in Touch with Engelhardt

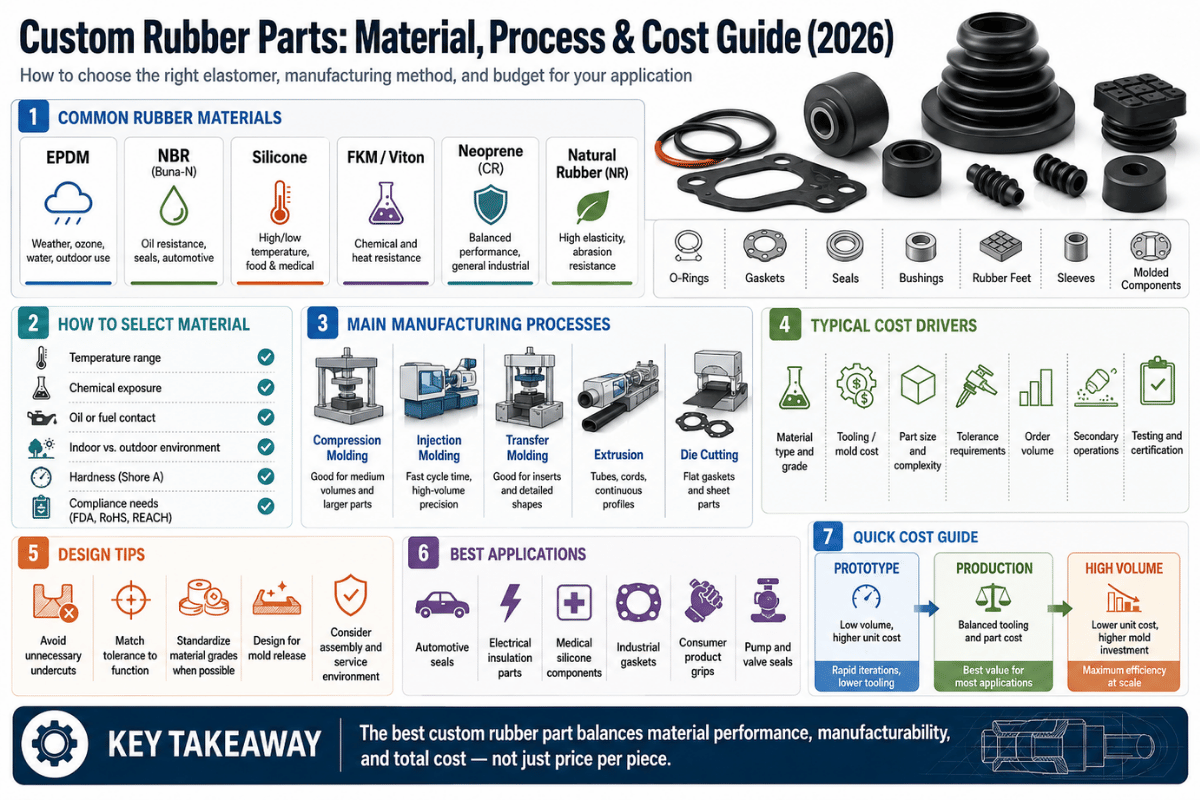
When buying custom rubber parts, everything seems straight forward until you receive your first quote, where the numbers vary by 3x between suppliers. For what’s a seemingly identical component, this discrepancy rarely happens due to one supplier’s greed; instead, it’s the result of 4 factors you control directly on the drawing; the compound specified, the tolerance class you desire, the molding process suitable for your production volume, and the cutting process for the tooling. Address these four components, and you control cost, lead times, and scrap rate.
This guide walks you through each critical decision in the order of thought you’d approach when thinking like a Sourcing Engineer; along with estimated costs that most supplier web pages will never share. if you know exactly what you need and just want a quote then use our custom rubber parts service. if not, start here:
Quick Specs: Custom Rubber Parts at a Glance
| Common compounds | NBR (nitrile), EPDM, silicone (VMQ), FKM (Viton), neoprene (CR) |
| Hardness range | 30–90 Shore A (tolerance ±5 per ISO 330²-1) |
| Molding processes | Compression, transfer, injection, LSR injection |
| Standard tolerance grade | ISO 3302-1 Class M2–M3 (RMA commercial equivalent) |
| Material classification | ASTM D2000 / SAE J200 line callout; nomenclature per ASTM D1418 |
| Typical hard tooling | ~$5,000–$50,000, driven by cavitation and part size |
| First-article lead time | ~3–4 weeks typical for compression/transfer |
What Makes a Part “Custom” — and When You Actually Need One
Custom molded rubber refers to a rubber part produced using a tool designed to your part’s dimensions, with a compound selection optimized for your service conditions, rather than pulled from standard sizes in a catalog. That difference is cost – a custom tool represents a one-time expense (tooling) to create the tooling which standard parts avoid. Hence, your initial consideration shouldn’t be “which supplier” but “do I need custom?”
Always first consult your parts catalog. Before ordering a tool, verify that off-the-shelf components are readily available if your part is a standard O-ring, grommet, circular seal, or gasket from a sheet. If your part features unique geometry, material (durometer), compound, or includes a bonded-metal component, a custom tool may be justified by meeting a specification a standard item can’t.
⚠️ Common misconception
Choosing a custom tool doesn’t automatically increase your unit cost; once amortization is complete, a high-cavity custom mold may offer a lower unit price than a standard part, because it eliminates ongoing royalties for existing designs. True cost arises from purchasing a tool for a part a vendor already provides.
Selecting a custom tool initiates a cascading effect on the decisions to be made there after – from material compound and manufacturing process to the optimal tolerance, and the resultant cost. Every decision following the initial tool decision will adhere to this progression. Consult our custom rubber molding capabilities to view the complete process.
Choosing the Rubber Compound: NBR vs EPDM vs Silicone vs FKM vs Neoprene
The most critical factor in ensuring part durability is the compound choice, which is determined by the conditions it will encounter. Primarily consider the three forces that degrade rubber: temperature, the chemical nature of fluids it will contact, and exposure to weather (such as ozone and UV). Failure to align the compound to these environmental pressures will render any selection of tolerance and manufacturing process irrelevant. Compounds are described in standardized forms, using the ASTM D2000 industry standards, or SAE J200 line-callouts where a ‘Type’ signifies heat rating and a ‘Class’ signifies oil resistance.
| Compound | Temp range | Strong against | Weak against | Rel. cost |
|---|---|---|---|---|
| NBR (Nitrile) | −40 to +120 °C | Oils, fuels, hydraulics | Ozone, UV, weather | $ |
| EPDM | −50 to +150 °C | Water, steam, ozone, UV, weather | Petroleum oils, fuels | $ |
| Silicone (VMQ) | −60 to +200 °C | Extreme temperature, inert, FDA grades | Low tear and abrasion strength | $$$ |
| FKM (Viton) | −20 to +200 °C | Fuels, aggressive chemicals, heat | Low-temp flexibility, cost | $$$$ |
| Neoprene (CR) | −40 to +100 °C | Balanced weather + moderate oil, refrigerants | Strong acids, high heat | $$ |
These are indicative of general compounds; specific properties will vary depending on formulation. Refer to specific compounds’ data sheets for definitive properties. ASTM D1418 naming convention is used below.
What is the best rubber material for outdoor or weather seals?
For anything living outdoors – window gaskets, enclosure seals, roof components – EPDM’s the choice, and the logic’s in the chemistry. EPDM’s saturated polymer backbone lacks any double bonds for ozone to react with, so it resists UV exposure and weather-cracking where nitrile will stiffen and split within a single season. Conversely, that same backbone means EPDM succumbs quickly when it encounters petroleum oils. Should the part experience both weather and oil exposure, it’s a textbook neoprene scenario, balancing both variables. Our rule of thumb: outdoor/water means EPDM, oil/fuel means NBR, and both simultaneously calls for neoprene or a specialty grade. If you’re unsure how silicone fares on other rubber types for temperature requirements, consult our chart.
📐 Engineering Note
If considering dynamic seals, focus on compression set rather than just hardness. Some compounds meet durometer specifications, but collapse with prolonged loading, destroying seal integrity over time. silicone preserves high-temperature compression set effectively, while nitrile maintains excellent stability in oil exposure. Be sure to assign the correct grade to your ASTM D2000 product line, and include a requirement for compression-set if the seal is continuously loaded (e.g., specify ASTM D395 Method B).
Molding Processes Compared: Compression vs Transfer vs Injection
Your choice of molding process should precede any quality considerations: the molding method will be your determining factor. All three rubber processes are capable of producing precision parts, and the optimal selection is dictated by the balance of tooling investment against the per-part price as your annual volume increases. Selecting the wrong process will result in overpaying for unneeded tooling or a higher per-part cost with tooling that can’t keep up.
| Process | Tooling cost | Best volume | Tolerance band | Best fit |
|---|---|---|---|---|
| Compression | Lowest | Low–medium; large parts | ISO 3302-1 M2–M3 | Prototypes, big seals, low quantities |
| Transfer | Moderate | Low–medium; bonded inserts | M2–M3 | Parts with metal inserts, tighter flash control |
| Injection | Highest | Medium–high volume | M1–M2 | High-cavity production, complex geometry |
Which rubber molding process is cheapest for low-volume parts?
When planning for low volumes, compression molding is typically the best option, due to simple economics. Its tooling is lowest, as the tool is really just a simple open cavity that clamps shut around a rubber preform, with no runners or injected hardware required. Its catch come at the part level – a longer cycle time increases the per-part cost compared to injection molds that don’t require this loading and slow cure. Compression molding is the least expensive option until the annual quantity is sufficiently high for the per-part penalty to offset the tooling cost, making injection more cost-effective. For situations involving a bonded metal insert but without the necessity for injection-level tooling expense, transfer molding is the ideal choice.
Let’s bust a myth: the idea that injection molding offers superior precision to compression molding is not inherently true. Precision in molded rubber is largely determined by the quality of the tool design and its ability to manage compound shrinkage, regardless of the process name; all of the ISO 3302-1 tolerance class tolerances are applicable across all three methods. It’s entirely possible to achieve tight M2 class dimensions with a well-designed compression mold on a simple component that even a poorly manufactured injection tool could fail to match. For an in-depth comparison of rubber molding methods and a closer look at the workings of compression molding and rubber injection molding, visit our resources.
“The argument about the process is a buyer distraction. Nine times out of ten, the tolerance problem that we’re back to is a parting line applied to a sealing face or a compound using a bad shrinkage estimation-either or both is fixable at the tool design stage on any process,”
Tolerances and Quality Standards You Should Actually Specify

Almost all rubber-part disagreements boil down to a tolerance that nobody agreed to. Rubber shrinks during the cure cycle, and by how much depends on the compound, the tool, and the part’s geometry, so there’s really no such thing as “tight tolerance” until you have a class assigned to it. The international standard is ISO 3302-1, which classifies molding tolerances from M1 (precision) up through M4 (coarse). When you call out the appropriate class on your part drawing, you turn a wish into a contractually binding spec.
| Nominal dimension | M1 (fixed) | M2 (fixed) | M3 (fixed) | M4 |
|---|---|---|---|---|
| 0–4.0 mm | ±0.08 | ±0.10 | ±0.25 | ±0.50 |
| 10.0–16.0 mm | ±0.15 | ±0.20 | ±0.40 | ±0.80 |
| 63.0–100.0 mm | ±0.35 | ±0.50 | ±1.00 | ±2.00 |
| Hardness | ±5 Shore A across all classes | |||
Values in mm, dimensions, fixed:per ISO 3302-1:2014. Note how wider tolerances are applied to “closure” dimensions (between the two halves of a tool) compared with dimensions that are fixed in only one of the two tool halves:
📐 Engineering Note
Don’t just blanket your drawings in M1, even if your design engineer tells you to. The tightest precision tolerances increase tooling costs and scrap, and most features on your rubber part won’t come close to requiring that level of precision. Reserve M1/M2 only for the “features where it matters” – the dimensions that are intended to seal or mate, and leave the rest at M3. Also make sure you’re distinguishing between fixed dimensions and closure dimensions because dimensions that are created between tool halves will always be somewhat different from the ones molded in a single tool half.For a complete guide to rubber molding tolerances, check out this article.
What Actually Drives the Cost of Custom Rubber Parts
When two rubber part quotes come in different, there’s usually 4 levers to account for the price differences. The trick is to identify and understand those four levers: “The 4 Lever Cost Model.”
The 4-Lever Cost Model for Custom Rubber Parts
- Tooling – the mold cost. The cost of tooling, also called the one-time cost, generally costs some where around $5,000 to $50,000 for hardened tooling, although the cost is going to depend on the complexity of the part, how many units the tool will support, and how large the part is. Reduce the tool cost by simplifying the shape of the part rather than by reducing cavities.
- Cavitation – the number of cavities in the tool. More cavities in the tool lower the cost per part, and higher tooling cost, which works best when your production volumes are high.
- Material – Different compounds are more or less expensive to produce. A kilogram of FKM compound can be anywhere from 3-7 times as expensive as the same amount of NBR compound.
- Volume – how many units you’ll buy. This lever dictates all the others! Volume is critical because it tells suppliers how many parts need to be run, this tells them what the tool need to be capable of doing, which in turn affects how expensive the tool will be, and it’s here that the low end price is set.
How much does a custom rubber mold cost?
There’s not a specific number to fall back on but there’s definitely a defensible range. Running a tool at the lower end of production (e.g. a low volume simple single-cavity tool run with NBR, producing 3 inches cubed parts) could be around $5,000 total. A large multi-cavity high-volume production tool made from the FKM, producing very large and intricate parts could be anywhere from 35,000 – $50,000. Price per part usually ranges from a few bucks to a couple tens of dollars depending on part, volume, material, and whether you went multi-cavity or not. Be weary of suppliers that aren’t asking for the volumes, because that’s where their initial calculations will be wrong for determining how much the tool has cost them to make. Remember that these ranges are estimates and each part is different so give us a drawing so that we can provide accurate pricing of your part, a complete review of rubber costs can be found here
💡 Pro Tip
Easiest Way to Shrink a Rubber Quote The quickest way to chop a rubber price is to ditch unnecessary tolerances and downgrade an over-specified compound – neither compromises your tooling. Pulling cavities increases part cost and can cost you down the road. Need a ball-park idea?
Try our cost-driver estimator.
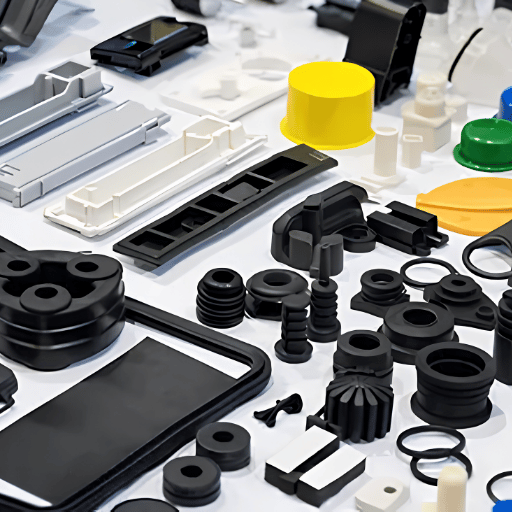
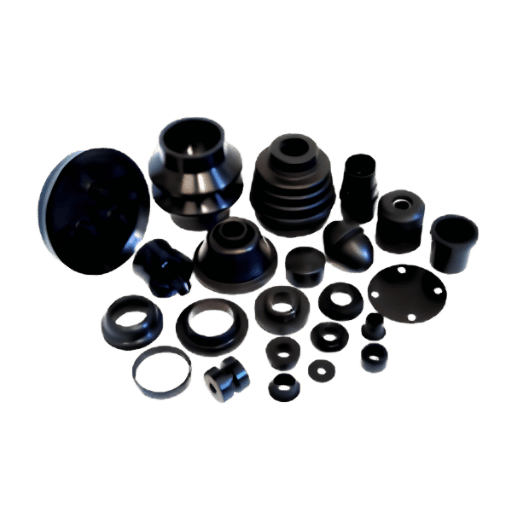
Common Custom Rubber Part Types and Their Applications
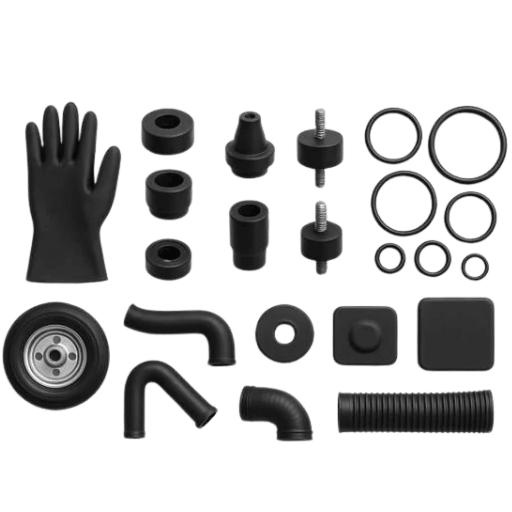
“custom rubber parts” isn’t a part, it’s a category. Specifying a category early matter, because each one has its own spec priorities-a seal prioritizes compression set, a vibration mount prioritizes durometer and dynamic load, and a bonded bushing prioritizes adhesion. Here’s the terminology procurement professionals use.
- Gaskets and seals-These static seals separate two surfaces and the compound and compression set are paramount. View custom rubber gaskets and seals.
- O-rings-A workhorse dynamic and static seal; surface finish and cross section are essential. View custom O-rings.
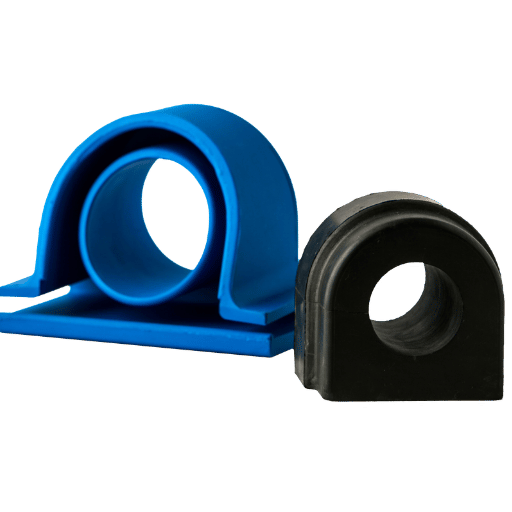
- Grommets and bushings-A category for the parts that protect wires and absorb vibration; the feel is determined by durometer. View rubber grommets and bushings.
- Vibration mounts and bumpers-Designed to turn dynamic load into heat, you need to specify durometer and load (not shape!).
Driven By Compound Application Automotive parts typically use heat-and-oil compounds and usually requires IATF 16949 certified parts; see custom automotive rubber parts. Water and plumbing components require either NSF or WRAS listed compounds. Take this: A vibration mount holding a compressor to a frame didn’t fail because the rubber quality was bad, but because the engineer specified a 70 Shore A bumper when a 50 Shore A would have better absorbed and dissipated energy -a case of Misplaced durometer.
Bonded For Load When the rubber has to bear structural load, the answer is bonded assemblies. Metal-bonded mounts and bushings are manufactured with a unique adhesive that’s molded into the part, requiring another layer of expertise explained in our rubber-to-metal bondings guide, usually with a transfer molding method to cleanly hold the insert in position before rubber injection.
Design for Manufacturability: 6 Mistakes That Inflate Cost and Scrap
Top Six DFM Design Blunders The majority of cost overruns were baked into the design before a single tool ever went to metal. Here are the most common DFM errors you’ll find on an RFQ, with 6-Digit DFM error code, which are easily fixable before you invest in tooling.
- Maintain Uniform Wall Thickness Sections of varying thicknesses cure at different speeds, leading to sink, sink marks, distortion, and uneven material density. Ensure consistent thickness across part walls when function won’t be compromised.
- Ensure Proper Draft Allowing 1-3 degrees of draft for vertical surfaces ensures smooth removal from the mold without tearing. Many engineers start with about 2 degrees as standard practice. Avoid zero draft to make ejection significantly easier.
- Place Split Line Away From Critical Surfaces A split line at a sealing face, where a witness mark or flash could mar the critical sealing surface, is a common and costly error. Strategically place the split in a location that minimizes visual or operational impact.
- Round Internal Corners Sharp internal corners create stress concentrators that are prone to failure and tearing during use. Radius all internal sharp corners whenever geometry allows for design.
- Over-tight tolerances everywhere. Specifying the M1 tolerance class across the whole part adds cost for features that never needed it.
- Shrinkage must be considered in advance. The rubber compound shrinkage when fully cured, expressed as a percentage and depending on your specific recipe, must be added to the intended tool size during manufacturing. Ask to confirm this.
All of these don’t involve high tech solutions but need the problem to be detected before tooling. A half hour DFM check during quotation often obviates a tool change later. All of these points are included in checklists in our custom rubber molding guide,.
How to Vet a Custom Rubber Parts Manufacturer
With your spec ironclad, the supplier choice is less about price, more about risk. The buyer who equates value solely with unit cost inevitably learns a hard lesson about which job shop came to grief by being too hesitant to ask for details. Use the quick-check checklist on each potential candidate prior to investing in tooling.
- Standards appropriate for your field. Base level is ISO 9001, automotive (IATF 16949), Food/Water/Potable (FDA, NSF, WRAS).
- In-house tooling. Stores that make their own molds manage lead times and changes; out of house tooling require an extra transfer.
- On site-testing: – Hardness, Tensile, compression set tested in a proper lab – ask to see your sample report in real-time / live.
- First they inquire about volume then tolerances. A molder who quotes before asking you your annual quantity is guessing at the tool.
- Clear tooling ownership. get this in writing, who owns the mold and where is it kept.
That’s the standard we set as the manufacturer. We mold-make in-house and our own rubber compounding and our own on-site QC lab, under ISO 9001 and IATF 16949, performing material tests on every lot we produce. That’s what makes one building capable of handling your answers to the “volume,” “tolerance” and certification questions above.
Don’t know which rubber compound to lock in first?
Let us assist you with our rubber material selection wizard.
Industry Outlook: What’s Changing in Custom Rubber Sourcing (2025–2026)
“The custom rubber market is strong and there are two trends that I’d be anticipating for now. World elastomers in value were around USD 110.7bn in 2025 and this is expected to reach close to 118 bn in 2026, indicating demand is strong and high capacity will remain tight so book tooling slots well ahead of two years ago”
First up, geographic diversion. Tariff risk and China +1 pressure are encouraging buyer sourcing from around the region rather than all at one point. Manufacturers have also adapted. Engelhardt has invested 60,000 sq metres for a production base in Thailand, set to roll out in 2025, designed expressly to offer customers a tariff/lead-time offset. Is your 2026 programme trade-policy sensitive? Check out your suppliers’ actual locations.
Material. The second shift is here. Bio-based elastomers currently account for a niche slice but demonstrate high, double-digit annual growth rates, and FDA and water-grade green compounds are approaching commercial availability. For most applications, they won’t replace NBR or EPDM quite yet, but if sustainability is in your material specification, it’s now an option that warrants consideration and inquiry when you ask for a quote.
Frequently Asked Questions
Q: What are custom rubber parts used for?
View Answer
When used in automotive, plumbing, electrical and industrial equipment, gaskets,O-rings,grommets,bushings, and many vibration mounts and bonded metal to rubber components designed to a specific shape and compound create seals, cushion, and insulate, while also isolating vibration. As’custom’implies no standard part geometry, durometer, or compound exists and thus requires a new tool to be created. This is why a custom part carries a one-timetoolingcost upfront but a relatively comparable (or reduced) price per part once a moderate volume is achieved.
Q: What is the minimum order quantity for custom rubber parts?
View Answer
The minimum order quantities differ based on the process, and the part dimensions and is not typically set to a firm minimum. While compression molding will allow for smaller minimums and prototype quantities, the presumption for a high cavity tool used in high-volume injection tooling is a considerably higher minimum volume to justify it. The tool that best meets your requirements can be identified if you are prepared to share your annual quantities.
Q: How long does it take to make custom molded rubber parts?
View Answer
As soon as a first piece of the tooling is ready – typically within 3-4 weeks for the parts produced via compression molding and injection transfer methods- samples can be shipped. A more complex, multi-cavity injection tool requires more time. Due to its lengthy lead-time, it’s important to make sure you clarify your tool lead times up front as well as your first piece lead time.
Q: Is silicone or rubber better for custom seals?
View Answer
silicone is another rubber and is often chosen over nitrile in situations where the operational temperature and the FDA requirements are higher. Conversely nitrile is superior in applications where there are issues of oil resistance or tear strength.
Q: Can rubber parts be bonded to metal?
View Answer
Indeed yes, by applying a special, chemical adhesion system onto a prepared metallic insert a bond is created upon molding the rubber during cure time – like aengine mounts and bushings. Since a special adhesive formulation is required and surface preparations must be done precisely to bond to rubber-to-metal bonding the process must be done with a molder who specialize in these systems.
Q: What information do I need to provide to get a quote?
View Answer
The minimum amount of information required to initiate an order includes your design or 3D model, detailing dimensions and any other critical geometric features, the required compound or, if not specified, service conditions to which the part will be exposed. It is also helpful to provide, at a minimum, the desired hardness to be molded in Shore A, the required tolerance class on the more critical features, expected volumes annually, and any certifications such as FDA or IATF 16949 may be requested. Volume influences tooling and ultimately is much more important than many purchasers may be aware. The higher the level of detail in the submission, the less will be the response time and accuracy of the quote that we’re able to offer you. Typically a less complete submission of details will be met with requests for additional clarification prior to the proposal being made by our engineering team.
Have a drawing? Get a real number.
Send your custom geometry, choice compound, and annual requirements to receive a quote for tooling and part costs, with our engineers identifying the correct tolerance class on your specifications.
If you aren’t prepared for a quote yet, the molding process selector or the material selection wizard are available for your assistance.
About This Guide
We developed this because most “custom rubber parts” sites leave out the two quotes that are actually necessary for progress – the composite and the tolerance class. The material and ISO 3302-1 tolerance figures below are from published standards; the cost and lead-time figures below are field figures and will depend on your particular part shape and volume. Where a number depended on your part shape we indicated it, rather than using false precision.
References & Sources
- ISO 3302-1:2014, Rubber, Tolerances for ProductsInternational Organization for Standardization
- ASTM D2000, Standard Classification System for Rubber ProductsASTM International
- SAE J200, Classification System for Rubber MaterialsSAE International
- ASTM D1418, Rubber and Rubber Latices NomenclatureASTM International
- Elastomers: Properties and ApplicationsPolymer Properties Database
- Elastomers Market Size & ForecastFortune Business Insights
Related Articles
- Rubber molding methods comparison, compression vs transfer vs injection
- Rubber molding tolerances, ISO 3302-1 classes explained
- What custom rubber molding costs, tooling and piece price
- Rubber-to-metal bonding, process and adhesive selection
- Custom rubber gaskets and seals
- Silicone vs rubber, choosing by temperature and chemistry