Entre em Contato com Engelhardt


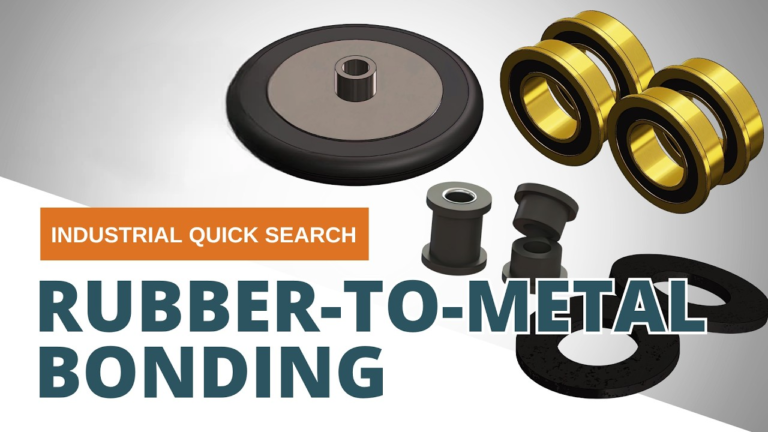
A ligação borracha ao metal é o processo que torna um elastômero e uma inserção de metal uma única parte de transporte de carga - e quando funciona ninguém percebe Quando falha uma montagem do motor cai, uma bucha de suspensão chocalha ou uma corrida de produção automotiva de 1.000 peças é rejeitada na inspeção de entrada Este documento descreve como as peças coladas são construídas, quais químicas adesivas lojas reais usam e os modos de falha que tornam uma linha de ligação confiável ou sucata Se você está especificando um serviço de ligação de borracha ao metal pela primeira vez ou solucionando problemas na execução de produção anterior failureto-topeel (início de produção anterior) aqui.
Especificações rápidas: Visão geral da ligação entre borracha e metal
- Especificação de teste de governo: 1TP8 T D429 (Métodos A, B, C) A casca padrão 90 automotiva é a casca padrão automotiva
- Resistência ao descascamento da indústria que você deve atingir: ≥ 6 kN/m (34 lb/in) montagens de motor automotivo sob IATF 16949
- Temperatura de cura típica: transferência de 145-171 C (293-340 F) e moldagem por injeção
- Espessura do filme seco do primer/adesivo: primer de 0,2-0,4 mil + revestimento de 0,5-1,0 mil (por especificação de LORD Chemlok)
- Causa raiz mais comum de falha: preparação de superfície, não definição de adesão
O que é ligação de borracha a metal?
A ligação borracha ao metal é um processo de união química ativado por calor no qual um elastômero não curado é permanentemente fundido a uma superfície metálica durante a vulcanização Uma camada adesiva de primer e capa repousa entre os dois materiais durante o aquecimento, e o calor e a pressão do processo novamente vulcanizam a borracha e também curam o adesivo A peça acabada é um único componente ligado que transfere carga por deformação de borracha com ancoragem de carga na linha de ligação para o metal.
A principal razão pela qual as oficinas de fabricação se preocupam com a química, em vez de apenas aparafusar, rebitar ou soldar uma almofada de borracha a uma peça de metal, é que os fixadores mecânicos concentram a tensão em cada ponto do fixador, causam fadiga de borracha ao redor do furo e degradam a vida útil da vedação e, eventualmente, vazam sob carga dinâmica. Uma ligação química distribui a carga por toda a área de contato, suporta milhões de ciclos de calor, amortece os chocalhos, desliza sob a carga sem guincho e fica em silêncio durante a vida útil da máquina. É por isso que transportar borracha para ligação de metal em aplicações de vibração sonora e aspereza é uma solução preferida em relação a conjuntos soldados, rebitados ou aparafusados, as ligações elastômicas amortecem o avião, caminhão e trilho, tudo isso permanecendo invisível quase até a borda dos dados de vibração do espectro.
Qual é o propósito da ligação de borracha a metal?
A necessidade funcional é combinar duas propriedades que nenhum material tem: a absorção de energia elástica de uma borracha com a ponteira e a fixação do metal A borracha sozinha não pode ser aparafusada em um compartimento do motor sem rasgar o orifício do parafuso aberto O metal sozinho não pode absorver a faixa de vibração de 20-200 Hz que cria a qualidade do passeio e o conforto da cabine A ligação entre eles produz um isolador que monta como um metal, amortece como um borrachinho exatamente o que faz com que as buchas de suspensão e os suportes do compressor operem de forma confiável durante milhões de ciclos.
A qualidade da ligação borracha-metal é testada de acordo com o Métodos de teste padrão ASTM D429 para propriedade de borracha - adesão a substratos rígidos, 0, que delineia cinco métodos de ensaio com letras O método A utiliza uma sanduíche de borracha entre metais puxada em tensão O método B, o ensaio de descascamento de 90 graus, é o padrão de facto da indústria para o CQ de produção porque não só indica o grau de resistência de união, mas também aponta onde a ligação falhou (R, RC, CM, ou M, detalhado na secção dos modos de falha).O ensaio de descascamento de 90 foi comprovado pela indústria desde pelo menos a década de 1980.
Como a borracha está ligada ao metal? O processo de 5 estágios
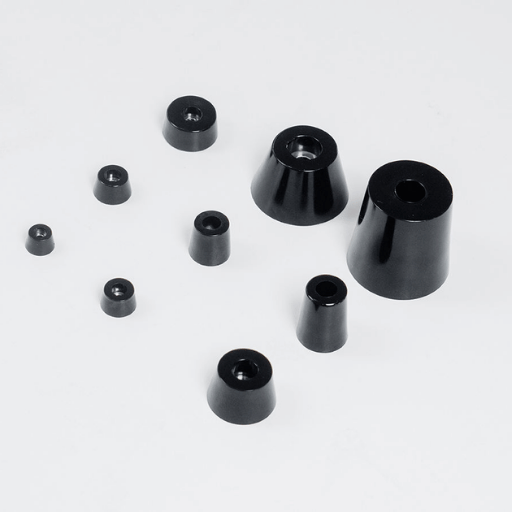
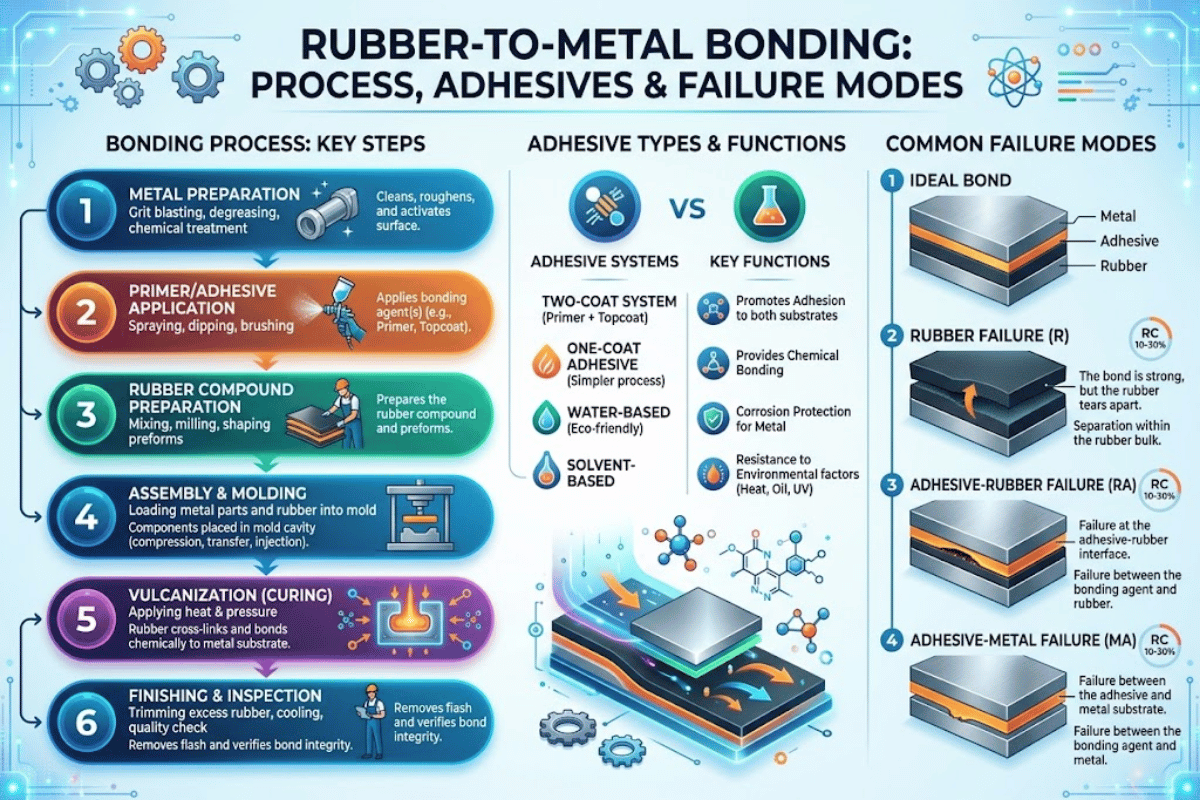
Cada linha de processo de ligação borracha-metal - cada loja de 500 peças por dia faz loja para 50.000 por semana (Tier-1 OEMs trabalhando montagens de motor no padrão automotivo 1TP3 T, por exemplo) - passa pelos mesmos cinco estágios O que diferencia cada loja é o grau de controle apertado para cada etapa Estas cinco etapas são: preparação da superfície do metal, revestimento de primer, revestimento adesivo de capa (topcoat), moldagem com co-cura e QC destrutivo.
A sequência de produção de borracha colada em 5 estágios
- Preparação de metal: desengordurar, granular a um perfil de superfície definido, aplicar opcionalmente revestimento de conversão de fosfato para aço carbono e, em seguida, manter-se livre de recontaminação.
- Revestimento do primer: pulverize sobre uma camada muito fina de primer (mais geralmente SENHOR Chemlok 205 aqui) com 0,2-0,4 mil de espessura de filme seco e deixe o solvente evaporar completamente.
- Adesivo de revestimento: pulverize sobre uma segunda camada (Chemlok 220 ou 220 LF para ser livre de chumbo aqui) a 0,5-1,0 mil de espessura de filme seco sobre o primer.
- Molde e co-cura: carregue a inserção de metal preparada e revestida em um molde aquecido, injete ou transfira o composto de borracha não curado e cure a 145-171 °C (285-340 °F) sob pressão por aproximadamente 10- 20 minutos dependendo da geometria da peça e do elastômero.
- Ensaio destrutivo: puxe uma peça para cada lote em um acessório ASTM D429 Método B. Requer ≥ 6 kN/m para uma falha de borracha rasgada (R) para que uma peça automotiva passe; insista na falha adesiva (CM ou RC) como rejeição.
As falhas geralmente começam na etapa de preparação de metal O óleo de fresagem, as impressões digitais ambientais, o transporte de silicone do compressor de uma loja ou apenas a oxidação ambiente de uma superfície de aço nua horas após o jateamento podem causar uma quebra instantânea da ligação antes da aplicação do primer Um engenheiro de borracha veterano no Eng-Tips afirma que a terceirização da etapa de preparação de metal para um especialista, com comandos documentados de espessura da camada de primer e verificações de qualidade por lote, reduziu sua taxa de defeitos para bem abaixo de 11TP20 T, eliminou completamente todas as falhas da camada adesiva e permite que o resto de sua loja continue funcionando com altos padrões de qualidade com produtividade muito alta Esse mesmo efeito pode ser realizado por uma equipe de loja conscienciosa que controla a limpeza da superfície completamente, limites rígidos no manuseio de alimentos ou bebidas e usa uma única marca de primer consistente.
“Nós não experimentamos uma falha de ligação como você descreve Em geral, selecionando a formulação correta do primer para o substrato e a borracha, bons procedimentos na preparação e aplicação do primer e desenvolvimento da pressão adequada do molde desempenham um papel no sucesso da adesão.”
Nota de Engenharia Dados do Processo de Primeira Parte
Em nossa planta de Guangdong, a linha de ligação de borracha a metal executa 80 prensas de vulcanização através de uma capacidade de aproximadamente 500 moldes/ano As especificações operacionais típicas são manter a janela de explosão a prime menos de 4 horas; usar um teste de quebra de água como uma verificação de ir/não ir antes da preparação; e manusear as peças com luvas de algodão entre a aplicação do primer e a ferramenta na prensa Estas não são melhorias opcionais de controle de qualidade que fazem ou quebram a diferença entre uma passagem de borracha rasgada (R) e uma rejeição cara de cimento-metal (CM) no acessório ASTM D429.
Que temperatura é usada para a ligação de borracha ao metal?
Temperatura de cura varia dependendo do elastômero e sistema adesivo Chemlok 205/220 borracha natural ligada e neoprene para aço de baixo carbono em um molde de injeção ou transferência normalmente fica curado a 145171 C (293340 F), sob pressão de fixação, 10 a 20 minutos velocidades de temperatura de cura mais altas tempo de ciclo, mas pode resultar em sobre-cura de borracha (resistência à tração reduzida) e envelhecimento térmico do adesivo Temperatura de cura mais baixa deixa a borracha sub-curada e cria variação de dureza entre cavidades, que é um dos modos de falha mais fáceis de ignorar até que os retornos de campo comecem.
Três métodos de ligação comparados: vulcanizado, pós-cura e mecânico
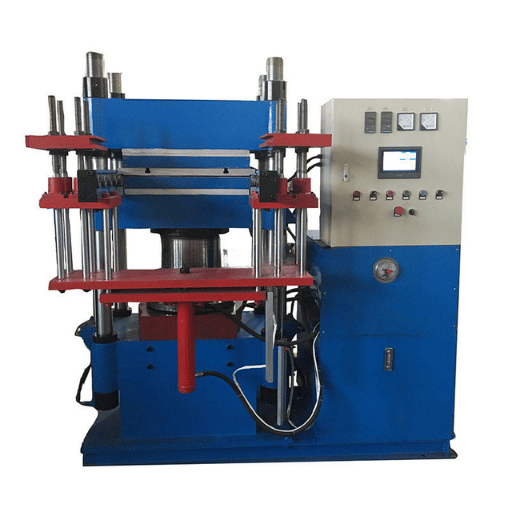
Nem todas as montagens de borracha “ligadas a metais” estão usando a mesma química Você encontrará três abordagens dominantes, e elas não são intercambiáveis Selecionar a abordagem incorreta é a maneira mais rápida de sub-especificar uma peça que deveria ter sido projetada para uma co-cura, ou sobre-especificar uma peça que pode ter acabado de precisar de uma bucha simples de encaixe por pressão Use esta matriz comparação processo moldagem como ponto de partida, faça referência cruzada com a tabela abaixo.
| Método | Como funciona | Força típica de descascamento | Melhor ajuste |
|---|---|---|---|
| Vulcanizado (co-curado) | Primer + covercoat aplicado à inserção de metal, borracha não curada moldada contra ele, cura por calor e pressão ambos simultaneamente Esse adesivo forma uma ligação química durante a vulcanização. | ≥6 kN/m (34 lb/in); falha de borracha rasgada (R) em ASTM D429 Método B | Movimentos de motor automotivo, buchas de suspensão, isoladores antivibração, qualquer peça dinâmica mantida em IATF 16949 |
| Adesivo pós-cura | A borracha é primeiro totalmente curada em sua forma final, depois colada ao metal com um adesivo estrutural (cianoacrilato, epóxi, uretano de duas partes).Nenhuma química de co-cura. | Normalmente 1 kN/m; falha na linha adesiva, não na borracha | Retrofit ou reparo de campo, peças de protótipo, conjuntos estáticos ou leves não submetidos a cisalhamento dinâmico |
| Encapsulamento mecânico | A inserção de metal é fisicamente dentro da borracha moldada (também chamada de moldagem de inserção).Nenhum adesivo químico (a borracha presa) segura o metal por compressão e intertravamento geométrico. | N/A não depende de uma ligação adesiva; mantendo a geometria da inserção e o durômetro de borracha | O-rings com núcleos de metal cativos, ilhós, vedações onde o metal não precisa transferir carga de tração |
A linha inferior dessa tabela é que apenas a ligação vulcanizada fornece o modo de falha de borracha-rasgo que os usuários finais automotivos e industriais esperam As aplicações adesivas pós-cura são válidas para reparo e prototipagem; o encapsulamento mecânico é a escolha correta para vedações de suporte de carga com metal cativo, mas nenhuma delas produz a ligação interfacial química que suporta um milhão de ciclos de tensão sob condições NVH Se você tiver um fornecedor propondo aderir uma almofada de borracha curada a um suporte de metal em uma montagem de motor, essa peça vai falhar no campo.
A regra de títulos 80/20
Aproximadamente 80 T de falhas de ligação borracha-metal são atribuíveis ao pré-tratamento de metalTP20 T de borracha porque é que 201TP20 T de processo que leva o menor tempo faturável A química recebe toda a imprensa porque LORD, Henkel e R & H têm engenharia substancial por trás de suas fichas técnicas, mas Chemlok 205/220 executa como necessário quando a superfície de aço está limpa Quando o aço está contaminado ou passivado, nenhuma química adesiva pode compensar Esta é a única regra prática mais útil para um comprador de componentes de borracha colados: pergunte ao fornecedor sobre sua especificação de preparação de superfície antes de perguntar sobre sua química adesiva.
Qual é a diferença entre a ligação vulcanizada e pós-cura?
Na ligação de borracha vulcanizada não curada adere ao metal preparado o ciclo de moldagem é também o ciclo de ativação do adesivo Os grupos reativos do Primer se complexam com as moléculas de elastômero de reticulação à medida que se desenvolvem, e isso explica por que a superfície de falha é a borracha (a borracha rasga antes da linha de ligação envolve uma borracha já totalmente reticulada e quimicamente reativa, e o adesivo só pode agarrar a superfície externa da borracha É aí que as resistências ao descascamento caem em uma ordem de grandeza e o modo de falha muda de borracha-rasgo para falha na linha adesiva.
Há também um paradoxo menos falante da espessura do primer A folha de dados LORD Chemlok 205 lista 0,2-0,4 mil filme seco Um especialista em ligação aeroespacial em Relatórios ENG-Tips que os primers devem ser mantidos sob 0,0002 polegada porque a maioria dos primers estruturais se tornam frágeis e se transformam no elo fraco acima desse limite O revestimento excessivo e o subrevestimento falham; a janela do processo é mais estreita do que a maioria das especificações admite.
Borracha para adesivos de ligação de borracha para metal Matriz de seleção de ligação
Peça a qualquer engenheiro de borracha para usar e a primeira resposta é dominada por “talk para LORD”, que significa adesivo Hannifin, desde a aquisição pela LORD Adesivos vulcanizantes Parker Lord Chemlok. A família Chemlok tem sido o padrão industrial de classe mundial de fato desde que a LORD Corporation o comercializou na década de 1950, e mesmo os concorrentes que se destacam na ligação borracha a metal especificarão a Chemlok em suas próprias linhas. As famílias Thixon e Megum da Henkel & Rohm & Haas são as alternativas confiáveis para ambas as químicas específicas de elastômeros, mas Chemlok é o ponto de partida padrão.
Escolher um sistema adesivo torna-se um problema de três variáveis: o composto de elastômero, o substrato metálico e o ambiente de serviço Os emparelhamentos mais comuns da Chemlok estão resumidos na tabela abaixo. Combine-os com os seus próprios seletor composto elastômero borracha para finalizar o grau de borracha antes de se comprometer com um adesivo.
| Elastomero | Primer | Capa | Faixa de temperatura de serviço | Aplicação Típica |
|---|---|---|---|---|
| Borracha natural (NR) | Chemlok 205 | Chemlok 220 / 220LF (sem chumbo) | °C | Movimentos do motor, buchas de suspensão, almofadas antivibração |
| Neoprene (CR) | Chemlok 205 | Chemlok 220/6125 | °C a +100 | Montagens adjacentes a óleo, componentes marítimos |
| Nitrila (NBR) | Chemlok 205 (opção de casaco único) | Chemlok 220 | °C a +100 | Vedações de contato com combustível, buchas hidráulicas |
| EPDM (curado com enxofre) | Chemlok 205 (é frequentemente necessário um primer especializado) | Chemlok 250/série Thixon | °C a +120 | Selos meteorológicos, isoladores HVAC, suportes expostos ao refrigerante |
| EPDM (curado com peróxido) | O valor de 200% Requer consulta O valor padrão da Chemlok não pode | Capa compatível com peróxido | °C a +150 | Aplicações de EV e eletrônica de alta temperatura |
| Fluoroelastômero (FKM/Viton) | Chemlok 5150 | Chemlok 6108 | °C a +200 | Sistemas de combustível, selos turbo, suportes expostos a produtos químicos |
| Silicone (VMQ) | Primer à base de silano (não Chemlok 205) | Capa especial silicone | °C a +200 | Bombas médicas, selos aeroespaciais, isoladores de contato com alimentos |
“Bonding 1TP9 T ao metal sempre foi um problema Você realmente precisa entrar em contato com LORD para um adesivo especializado ou parâmetros de processo para controlar este não é um caso onde um padrão Chemlok stack resolve o problema por si só.”
Este consenso do fórum carrega absorção: em particular 1TP9 T curado com peróxido pode ser o elastômero com maior probabilidade de surpreender até mesmo um engenheiro experiente 1TP9 T curado com enxofre liga decentemente com uma pilha padrão de primer-coat, mas 1TP9 T curado com peróxido não tem nenhum local de reticulação de enxofre para a aderência adesiva, e resulta em um modo de falha de borracha de cimento (RC) no teste de resistência ao descascamento Onde as especificações exigem 1TP9 T de alta temperatura, diagnostique qual sistema de cura o compostor de borracha desenvolveu antes de depositar em um procedimento de ligação.
O E6000 ligará borracha ao metal?
E6000 é um adesivo de contato projetado para uso em artesanato e reparos de consumo Ele vai segurar uma almofada de borracha em um suporte de metal em condições estáticas por um curto período de tempo, mas não é de forma alguma uma solução de fabricação Resistência ao descascamento de borracha-metal speciens colados com E6000 é uma ordem de magnitude abaixo dos sistemas Chemlok de grau automotivo, a linha de ligação não é resistente ao óleo ou ciclagem térmica, e o adesivo amolece sob carga estática sustentada acima de aproximadamente 60 C. Para qualquer borracha para metal peça colada que pode encontrar cisalhamento dinâmico, ciclagem térmica ou fluido em operação, adesivos de grau de consumidor são a ferramenta errada para usar Use sistemas de primer e cobertura de grau de vulcanização e cure a borracha para o metal em um único ciclo de molde.
Cinco modos comuns de falha e como diagnosticá-los
Todas as falhas de ligação parecem a olho nu ser o mesmo problema: uma parte de borracha cai de uma inserção de metal 1TP8 T D429 Método B dá ao engenheiro plástico as palavras para descrever o que exatamente aconteceu quando as 4 superfícies de falha são reveladas: R significa rasgo de borracha (verde), RC significa falha entre a borracha e o revestimento (amarelo), CM significa falha entre o revestimento e o metal (laranja), e M significa esfregaços de primer limpos da superfície do metal (vermelho) Essa letra indica onde no processo de fabricação olhar primeiro Aqui estão os cinco modos de falha que dão a grande maioria dos retornos de campo: resumidos do Schilthorn Precision análise de modo de falha publicada e profissionais no fórum de engenharia de borracha Eng-Tips.
1. falhas de CM da superfície do metal que transporta contaminantes de óleo Este é o clássico Os sintomas incluem esfregaço de óleo “rivers” através da face falhada, depósitos irregulares de primer, falhas no teste de quebra de água (a água repele em vez de varas para a superfície metálica limpa) e impressões digitais ou contornos de dedos As causas variam de transferência de silicone para fora de um compressor de ar de loja, a contaminação por impressão digital, à formação de óxido devido à janela de explosão a prime ser muito longa A ação corretiva são processos disciplinados: métodos de desengorduramento validados, uma janela de tempo definida de explosão a prime, manuseio de luvas de algodão e testes de quebra de água da superfície limpa antes de cada operação de primer Um engenheiro de borracha foi capaz de reduzir sua taxa de defeitos para aproximadamente 11TP20 T pela aplicação rigorosa de medições de espessura primer a superfície; este deve ser o modelo para a loja.
2. falhas RC de variação de espessura primer ou covercoat Este é o paradoxo da espessura primer do último parágrafo “ it ”punishes“ tanto para excesso e deficiência quantidade de promotor de adesão primer Se o primer é muito fino, pinholes desenvolver, através do qual a borracha flui durante a moldagem, criando zonas fracas locais Muito espesso, torna-se frágil uma vez curado, e rachaduras no tempo para a carga de casca Os sintomas incluem separação adesivo-face limpa após teste de rasgo de borracha, e visível ”river padrão” streaking na face falhou Contramedidas são para calibrar o equipamento de pulverização periodicamente, monitorar o conteúdo de sólidos primer-spray, e destrutivamente peças de teste de seção transversal espécime e medir a espessura real do filme seco.
3. sob o desequilíbrio da cura/cura: mais comum do que você pode pensar. Normalmente, uma necessidade de executar novamente o processo com temperaturas mais altas e tempos de ciclo mais longos nunca será notada em médias de qualidade platcure pode levar 3-6 meses de tensão de campo antes do calor e as peças testadas por fadiga começam a mostrar resistência à tração perdida e linhas de ligação antes da falha Ca geralmente se resumem à deriva de temperatura do hidrogênio, redução do tempo de ciclo sem re-validação ou gradientes térmicos em moldes multi-cavidade permitindo que algumas cavidades sub-curam enquanto outras cavidades sobre-cura Os remédios são teste de reômetro para estabelecer o melhor perfil de cura para o elastômero formulado, mapeamento térmico da prensa, testes de envelhecimento acelerado antes da implementação da mudança.
4. incompatibilidade composto 1TP9 T. Este modo de falha é específico o suficiente para que muitos vê-lo apenas uma vez Peróxido lojas quando eles fazem, ele pode custar inteiro pré-produção corre 1TP9 T curado com peróxido tem uma química de superfície diferente do enxofre curado borracha, e os primers Chemlok convencionais muitas vezes não vai ligar em tudo Peróxido-1TP9 T precisa de um sistema de primer compatível com peróxido O que resulta é uma falha RC com uma linha de casca de borracha caracteristicamente limpa Nunca assuma uma mudança de composto de borracha é neutro em ligação: sempre executar um 1TP8 T D429 verificação lote primeiro.
5. falha de moldagem de empilhamentos de tolerância Este surpreende até engenheiros experientes que ventilam um post de acompanhamento no tópico Eng-Tips Descreve um caso onde a pilha da tolerância da inserção estava criando uma vedação não intencional ao longo de uma borda da cavidade do molde, impedindo a purga de ar adequada durante o ciclo do grampo O ar preso na interface produziu então os vóides localizados e uma borda fraca da ligação um modo da falha que olhe como a contaminação adesiva mas é realmente um problema do dispositivo elétrico-projeto A ação corretiva é verificação do CMM do nivelamento e da concentricidade da inserção, simulação do fluxo durante o projeto do molde, e monitoração da pressão na produção É por isso que os fornecedores do bonded-rubber levam a tolerância da inserção a sério (não é somente uma edição do ajuste-e-acabamento.
Cenário: A Deriva do Banho de Fosfato
Um fornecedor automotivo Tier-2 recebeu um retorno de campo de 80 unidades em montagens de motor durante um período de seis semanas A análise forense inicial de falha do tipo CM mostrou separação consistente da linha de ligação na interface metal-primer com metal limpo no lado com falha O adesivo permaneceu inalterado, o composto de borracha permaneceu inalterado e os parâmetros da prensa estavam dentro da especificação A causa raiz acabou sendo o banho de pré-tratamento de fosfato: uma deriva química no mês anterior havia deixado a camada de fosfato de ferro marginalmente mais fina e menos uniforme do que a especificação validada O wet-out do primer foi, portanto, inconsistente em toda a população de pastilhas A ação corretiva não foi uma mudança adesiva (foi adicionar titulação diária do banho de fosfato e uma etapa de verificação do perfil de superfície antes do priming Os retornos de campo caíram para zero dentro de dois ciclos de produção Este é o padrão: a deriva do processo no estágio de preparação de superfície produz falhas que parecem falhas adesivas, e a única maneira de capturá-lo é tratar cada etapa a montante como um parâmetro mensurável, não uma validação única.
Onde são usadas ligações de borracha para metal Indústrias e tipos de peças
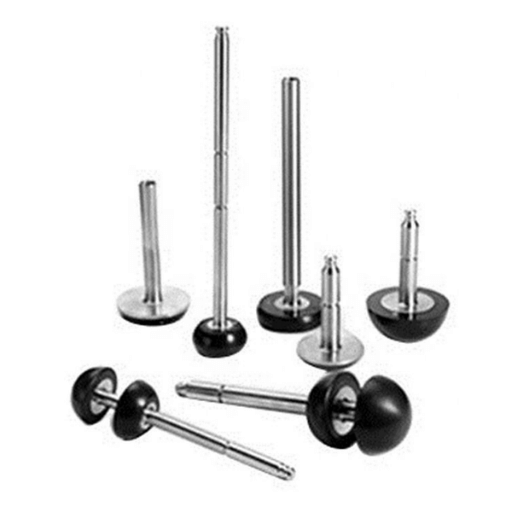
As peças de borracha coladas aparecem onde quer que a vibração deva ser amortecida e a carga transferida de forma confiável em temperaturas extremas, às vezes por décadas seguidas Nossa curta lista da indústria abrange dispositivos automotivos, de trânsito ferroviário, de máquinas industriais, aeroespaciais e médicos O que realmente difere é como as restrições de projeto mudam entre esses mercados, e como a escolha entre borracha nitrílica, 1TP9 T ou 1TP14 T é impulsionada pelo fluido específico e pelo ambiente térmico que cada aplicação impõe.
- Automotivo.: montagens do motor, montagens de transmissão, montagens de cabine, buchas de suspensão, buchas anti-roll bar, montagens de cremalheira de direção A especificação dominante é 1TP3 T e o alvo dominante da força de descascamento é 6 kN/m no dispositivo elétrico ASTM D429.
- Transporte ferroviário e de massa: buchas de suspensão primárias e secundárias, almofadas antivibrações abaixo do material circulante, suportes de motores de tração. Uma exigência de vida útil mais longa (mais de 20 anos) leva a seções mais pesadas e polímeros de base resistentes à oxidação.
- Máquinas industriais: suportes de compressores, isoladores de bombas, isoladores de montagem por pressão, patins de máquinas. Seleção durômetro depende do cálculo perturbador da frequência versus cálculo da frequência natural nesta aplicação. A borracha macia é a resposta errada se a frequência operacional se aproximar da frequência natural de montagem.
- Aeroespacial e defesa: isoladores de vibração para aviônicos, amortecedores de trem de pouso, suportes de pilão de motor Controle de espessura de primer mais preciso (a regra aeroespacial < 0,0002″) e testes adicionais de qualificação.
- Aplicações em dispositivos médicos: eixo colado para diafragma de bomba, isolador de silicone para metal para engrenagem compatível com MRI, componentes de bomba de contato médico-alimentar. A qualificação 1TP10 T/1TP6 T/1TP11 T para 1TP10 T/1TP6 T/1TP11 T adiciona um processo de seleção além da química do processo de ligação.
Embora muitos engenheiros de montagem de motores estejam interessados em aplicações NVH, eles são frequentemente os primeiros a não pensar em um aspecto fundamental deles: se você puder alterar a frequência natural de uma montagem em 5 Hz, ela pode ser alterada por um fator de 2 de dentro apenas com o durômetro de borracha, a seção transversal colada e a rigidez da inserção metálica, a parte estática do projeto A linha de ligação deve existir dentro de três caminhos de carga: quando a borracha se estica e aperta, a inserção de metal empurra para trás e a camada de primer transfere cisalhamento na interface Qualquer um desses três será uma montagem altamente transmissiva (se for o enrijecedor e, portanto, menos transmissiva) ou uma haste de borracha colada com um modo de falha inibidor de erro de cisalhamento da linha de ligação.
Como escolher um método de ligação borracha-metal (em inglês: Rubber-to-Metal Bonding Method) A Decision Framework
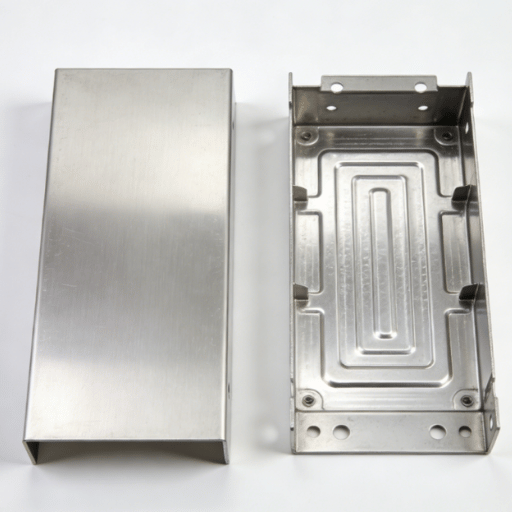
Não há uma única resposta correta para “qual método de ligação devo usar?” porque isso é realmente três perguntas em uma: substrato, elastômero, ambiente Esses três eixos modelo de decisão abaixo reduz a maioria dos problemas de especificação para um ponto de partida prático Corresponder isso com o comparação de propriedades do elastômero antes de decidir qual grau de borracha usar.
O Quadro de Seleção de 3 Eixos
Eixo 1- Substrato: o aço de baixo carbono é o tobond mais simples; o inoxidável deve ser jateado mais gravado com produtos químicos para penetrar na camada de passivação do óxido de cromo; o alumínio precisa de um revestimento de conversão de cromato ou fosfato; o latão pode ser ligado ao Chemlok 205 com desengorduramento com solvente.
O segundo eixo é o Elastomer: borracha natural e neoprene são a opção simples (Chemlok 205/220 usado como padrão); nitrilo e 1TP9 T curado com enxofre são complicações menores (+1 variável); 1TP9 T curado com peróxido, 1TP14 T e silicone são opções difíceis (+2 variáveis, sistema de primer especial, lote de teste verificado por descascamento antes da execução principal).
Eixo 3 Ambiente de serviço: carga estática em ar limpo às vezes pode tolerar um cisalhamento dinâmico adesivo pós-cura, imersão em ciclagem térmica ou intemperismo externo, todos requerem uma ligação vulcanizada co-curada.
A regra prática: se qualquer um dos eixos não for trivial (inoxidável, peróxido-1TP9 T ou serviço dinâmico/térmico), padrão para um processo de cocura vulcanizado com uma consulta especializada em adesivo. Quando todos os três eixos forem “easy” (aço de baixo carbono + borracha natural + serviço interno estático), uma pilha padrão Chemlok 205/220 com parâmetros de cura conservadores irá ajudá-lo.
Antes de emitir qualquer especificação, passe por uma lista de verificação pré-ligação de cinco itens: (1) estabeleça uma meta mensurável de resistência ao descascamento ASTM D429 Método B, não “good bond”; (2) estabeleça o envelope completo de temperatura de serviço, incluindo transientes de inicialização e desligamento; (3) especifique a liga e o acabamento do substrato (rugosidade superficial Ra, não “polished”); (4) vedar o composto de elastômero e o sistema de cura com o fornecedor; e (5) verificar se o sistema adesivo selecionado está livre de chumbo (220 LF ou equivalente) se REACH, RoHS ou as especificações OEM assim o determinarem. Cada entrada deve ser anexada a um padrão mensurável, seja um teste de número, norma ou aprovação/reprovação.
Perguntas frequentes
A Gorilla Glue liga a borracha ao metal?
Ver Resposta
No. Gorilla Glue espuma e se expande durante a cura, derrotando o contato molecular íntimo que uma linha de ligação precisa Use um sistema Chemlok de grau de vulcanização em seu lugar.
Qual é o adesivo borracha-metal mais forte?
Ver Resposta
Sistemas de primer e covercoat de grau de vulcanização, como o Chemlok 205/220, produzem linhas de ligação fortes o suficiente para falhar através da borracha A resistência ao descascamento da montagem do motor é aproximadamente uma ordem de magnitude acima de qualquer cimento de contato.
Você pode ligar borracha ao aço inoxidável?
Ver Resposta
Sim, embora a preparação da superfície seja mais difícil do que para o aço carbono A passivação do óxido de cromo que torna o aço inoxidável resistente à corrosão também impede a adesão, portanto, o jateamento de areia para um perfil Ra definido mais uma gravação química (ou um primer dedicado, como o Chemlok 5150 para inoxidável) é esperada antes da pilha padrão de revestimento de primer. A verificação de descascamento na preparação do lote é obrigatória com substratos inoxidáveis.
Quanto tempo dura uma ligação borracha-metal?
Ver Resposta
Uma montagem de motor automotivo corretamente ligada é geralmente classificada por pelo menos 10-15 anos ou cerca de 150.000 milhas de operação, assumindo que a peça não é constantemente inundada com água salgada, executada em temperaturas superiores a cerca de 150 C ou atacada quimicamente fora dos limites do trilho e isoladores industriais pesados são comumente classificados em mais de 20 anos Quando a ligação se degrada, normalmente o faz como delaminações visíveis da borda bem antes da montagem finalmente deixar ir.
A ligação borracha-metal é igual à moldagem por inserção?
Ver Resposta
Intimamente relacionado, mas não o mesmo A moldagem por inserção é a ação mecânica de colocar a inserção em uma cavidade e fluir borracha sobre a peça, muitas peças enxertadas quimicamente em todas as ligações (encapsulamento) o campo dinâmico é apenas atribuível pela geometria da borracha A ligação borracha-metal atinge um ritmo crítico ainda: adiciona disposição química primer-e-covercoat entre os dois materiais para que a borracha quimicamente se ligue com o substrato metálico durante o ciclo de co-cura O cimento ativa durante a vulcanização, formando ou seja, ligações químicas no limite no lugar de mero intertravamento geométrico Uma boa regra de ouro para os compradores: se a especificação do desenho chama para fora a resistência do peel 1TP8 T D429 ou especifica um primer réu como Chemlok 205, o fornecedor está entregando um conjunto quimicamente ligado e o critério de rejeição é uma superfície de falha borracha-tear Se o desenho especifica apenas “rubber sobremoldado em metal sem processos de ligação de metal com peel, mas o fornecedor mecânico de peel pode se comportar de forma muito idêntica, e pedir ao fornecedor de pedal, se o primer mecânico no.
Precisa de uma peça colada de borracha a metal construída com especificações de resistência ao descascamento de IATF 16949?
1TP2 T executa 80 prensas de vulcanização em bases de produção duplas China-Tailândia sob certificação 1TP4 T e 1TP3 T, com composição interna para NR, 1TP13 T, 1TP9 T, 1TP14 T e silicone Citamos conjuntos colados em desenhos carregados dentro de 48 horas e podemos entregar lotes de teste verificados por casca antes do lançamento completo da produção.
Carregar desenho (Upload Drawing) Quote em 48h
Baixe a lista de verificação de especificações de ligação borracha a metal (PDF)