Get in Touch with Engelhardt

Quick Specs: Rubber Overmolding
- Process types: injection, compression, transfer, LIM (liquid injection), two-shot
- Substrates: steel, brass, aluminum, thermoplastics (PA, PBT, PC, PPS)
- Shore A range: 30A to 90A (best grip: 50A to 70A)
- Bond strength test: ASTM D429 Method B (peel), ASTM D429 Method A (tensile button)
- Classification: ASTM D2000 line call-out system
- LSR process temperature: 120–150 °C (vs ~170 °C for HCR compression)
- Minimum rubber wall: 0.8–1.0 mm (LSR to ~0.5 mm); draft angle ≥ 2°
What Is Rubber Overmolding?

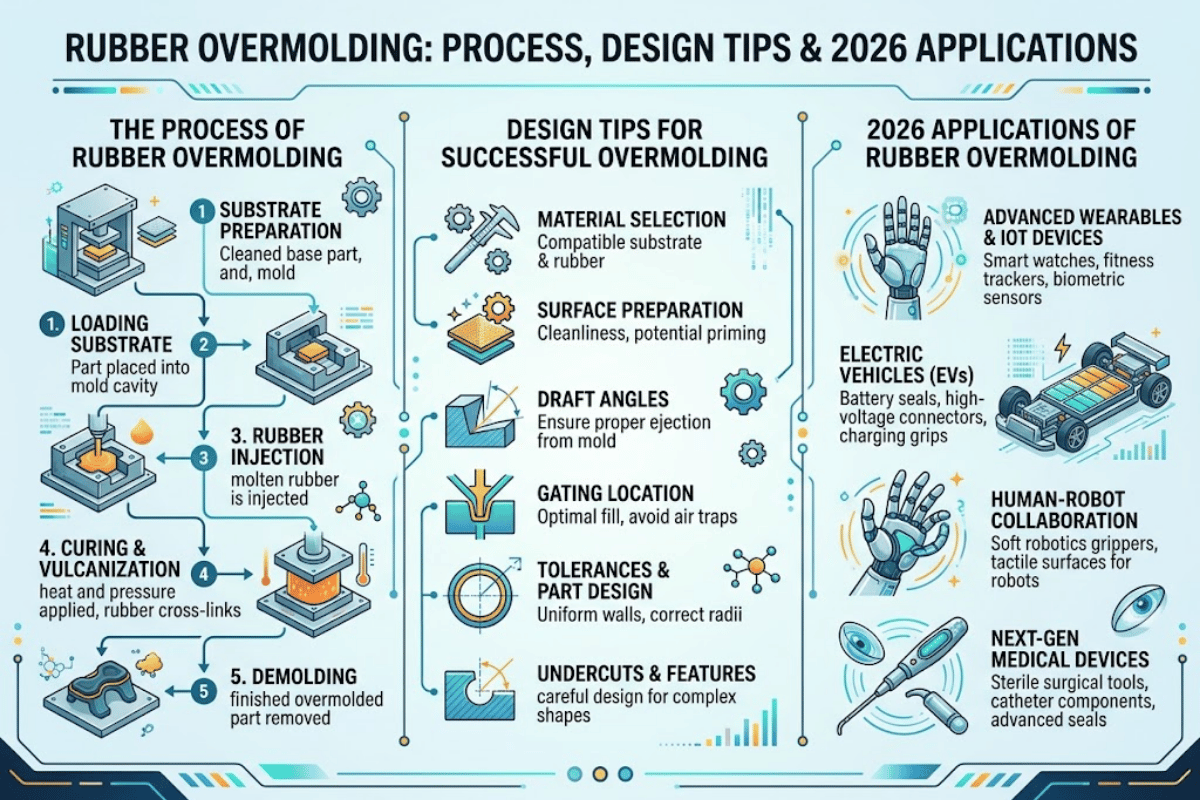
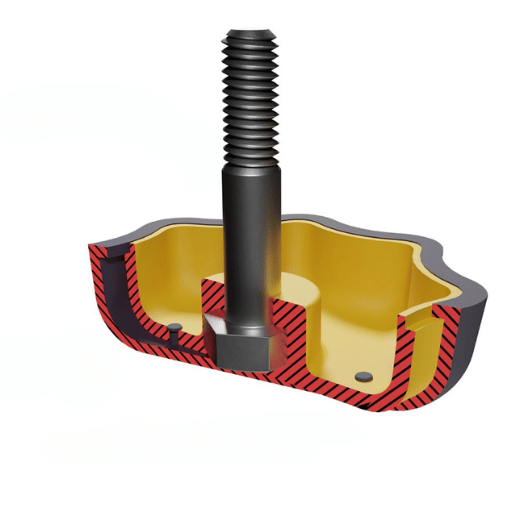
Rubber overmolding is a manufacturing process in which a rubber or silicone compound is molded directly onto an already-placed substrate — generally a preformed metal component, a thermoplastic part, or a previously cured piece of rubber. Inside the mold cavity, the base component is held in place while uncured rubber flows over and around it, fills the designed bonding surfaces, and cures in one pass. What comes out is a single overmolded piece, with a mechanical or chemical bond to the base component, no glue line, and one fewer steps needed on the line.
Engineers specify rubber overmolding most often because it eliminates a failure mode. Picture a hand-glued rubber bumper on a metal bracket: three things can go wrong — the glue, the rubber, and the metal. An overmolded bumper has one: the bond line. When the process is under control, that bond line is tested to ASTM D429, which gives it a verifiable peel-strength number instead of a pass/fail inspector’s judgment.
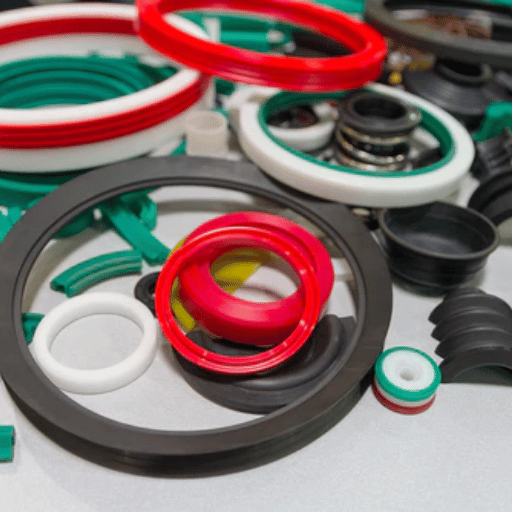
Typical applications include rubber-to-metal bonded dampers, sealed electrical connectors, medical device grips, and any geometry where a rigid substrate provides structure while the elastomer provides compliance, cushioning, or a sealing surface. Overmolding collapses three assembly steps into one cycle — and removes the adhesive failure mode that most field warranty claims eventually trace back to.
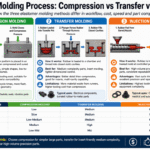
The Four Rubber Overmolding Processes Compared
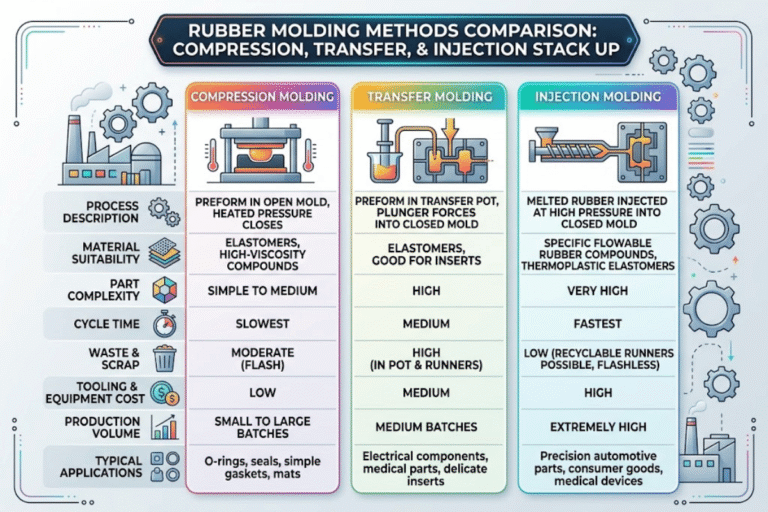
Not every elastomer needs the same mold, and not every geometry rewards the same process. Four main rubber overmolding processes account for nearly all production work: injection, compression, transfer, and LIM — liquid injection molding, also known as LSR injection. Two-shot is a hybrid in which plastic and rubber are injected back-to-back in one cycle. Which process wins depends on volume, geometry, and how temperature-tolerant the insert is.
| Process | Cycle Time | Tooling Cost Index | Best-Fit Volume |
|---|---|---|---|
| Injection (HCR) | 30 – 90 seconds | 3 – 4× | > 50,000 / year |
| Compression | 1 – 6 minutes | 1× (baseline) | 500 – 20,000 / year |
| Transfer | 2 – 5 minutes | 1.5 – 2× | 5,000 – 50,000 / year |
| LIM / LSR | 20 – 60 seconds | 3 – 4× | > 100,000 / year |
Injection and LIM dominate high-volume production work because once the tool has proven out, cycle times drop well below a minute. Compression molding stays relevant for prototypes, large parts, and specialty compounds where a simpler tool is easier to regrind than a hardened injection cavity. Transfer molding lives in between and is the usual choice when fragile inserts cannot be pushed through a rubber flow front without damage.
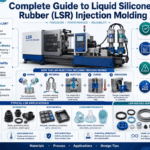
When Is LSR Overmolding Best?
Liquid silicone rubber overmolding is the right answer when two conditions are true at once: volume is high enough to amortize the tooling, and the substrate is too temperature-sensitive for hot compression. LSR cures at about 120–150 °C, while HCR compression runs near 170 °C. That 20–50 °C gap is the difference between an intact polycarbonate insert and a warped one. LSR also delivers near-zero flash, a 30A–80A durometer range, and biocompatibility grades that clear ISO 10993 — which is why rubber injection molding with LSR has become the default for catheter handles and wearable sensors. It is not the right answer for a 2,000-piece-per-year automotive prototype; there, compression still wins on tool cost.
Rubber Material Selection: Matching Compound to Application
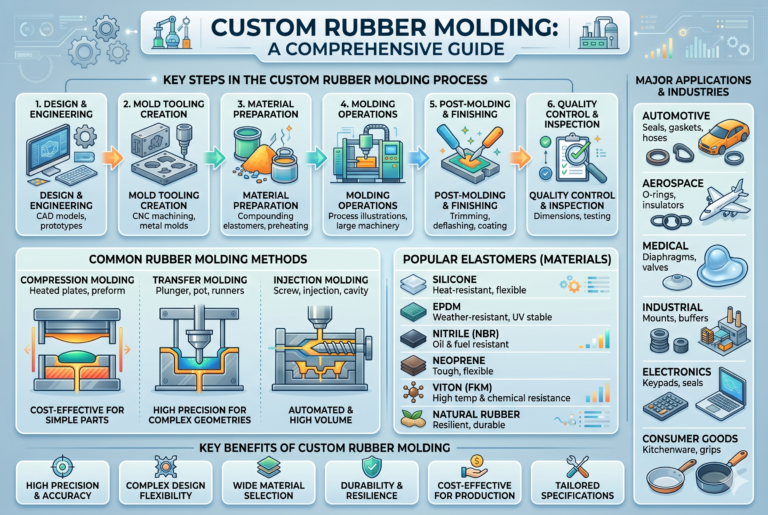
Compound choice is harder than process choice. Four main types of rubber show up in overmolding — silicone, EPDM, nitrile, and neoprene — plus thermoplastic elastomers when the substrate is itself a thermoplastic. Each has a different temperature envelope, chemistry profile, and cost index. Compound choice also drives whether a primer is required on the metal insert: some bond directly to cleaned steel, others need a two-coat adhesive system before the rubber will stick.
| Compound | Service Temp | Shore A | Typical Use |
|---|---|---|---|
| Silicone / LSR | −60 to +230 °C | 30 – 80 | Medical, food contact, electronics seals |
| EPDM | −50 to +150 °C | 40 – 90 | Weather seals, HVAC gaskets, outdoor parts |
| Nitrile (NBR) | −40 to +120 °C | 50 – 90 | Fuel and oil seals, automotive bushings |
| Neoprene (CR) | −40 to +110 °C | 40 – 85 | Vibration dampers, adhesive-friendly grips |
| TPE | −40 to +100 °C | 20 – 90 | Two-shot grips on plastic substrates |
Which Rubber Types Are Best for Outdoor or Automotive Overmolding?
EPDM is the default for weather-exposed parts because its backbone resists ozone and UV without relying on migrating plasticizers. For automotive underhood work where oil exposure is routine, nitrile is the safer call; EPDM swells in hydrocarbons. When a part has to survive both weather and oil — a common spec for commercial vehicle grommets — the practical answer is usually a blended compound or a silicone grade with an oil-resistant formulation, rather than a purist EPDM pick. Engineering forum contributors routinely note that both nitrile and polyurethane can be formulated non-marring, which matters for tool-handle applications where the overmold has to protect the workpieces it touches.
📐 Engineering Note
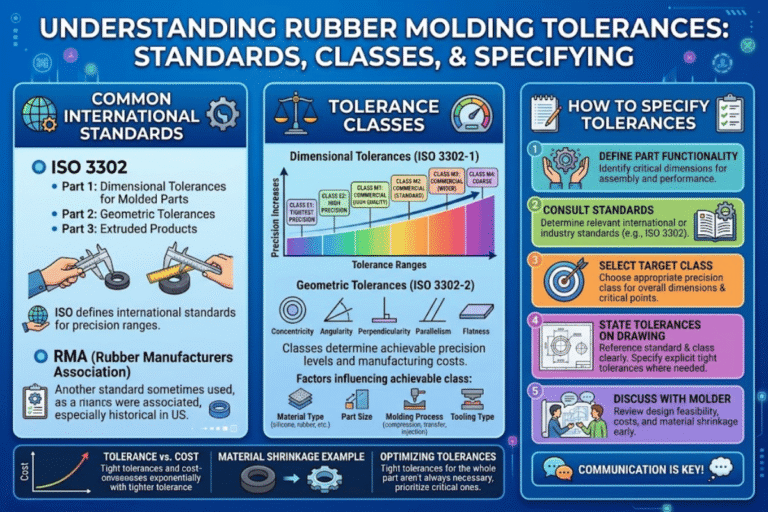
When a single part must survive both −40 °C cold starts and +150 °C engine bay cycles, specify the compound by the ASTM D2000 line call-out rather than a trade name. D2000 encodes hardness, tensile, compression set, and low-temp brittleness in one string — so two suppliers quoting the same line call-out are quoting the same envelope. Our rubber durometer guide walks through the trade-offs per application.
Design Rules: The 6-Point Overmold Readiness Check
Rubber overmolding design is where most projects are won or lost. Tooling is expensive to recut; a catch on the wrong draft angle turns a production mold into scrap. Design considerations for rubber overmolding are well understood in the trade, but they are rarely checked in one pass. Our 6-Point Overmold Readiness Check is the pre-tool-release gate we run on every quote before we commit steel.
The 6-Point Overmold Readiness Check
- Wall thickness: rubber layer ≥ 0.8 mm (LSR can go to 0.5 mm). Below this, short shots and knit lines become the dominant defect.
- Draft angle: ≥ 2° on every rubber surface. Rubber grips the tool harder than plastic, so less draft means torn parts on ejection.
- Undercut: ≤ 0.4 mm, or engineered with a collapsible core. Rubber’s elasticity can escape shallow undercuts; deeper ones punish the ejector.
- Insert retention: the substrate must be held on at least two datums inside the cavity. A floating insert shifts under flow pressure and shows up as a wall-thickness mismatch on CMM.
- Gate location: place the gate so flow reaches the last corner before the knit line cools. For rings, two-gate balanced fills beat single-gate every time.
- Vent placement: every dead-end pocket needs a vent under 0.03 mm deep. Missing a vent is the single biggest cause of burned rubber and bond voids.
Rules one and six are the two most often violated on first-time quotes. Designers inherit a CAD model from the plastic part and assume the rubber layer inherits the same wall. It does not — rubber’s minimum flow thickness is almost always thicker than an engineering plastic, so the layer needs to be redesigned, not copied across. Venting follows the same pattern. Plastic parts rarely trap gas the way a rubber overmold does, because curing rubber releases volatiles that need somewhere to go. Without vents, those volatiles burn in place and leave voids at the bond line.
Common mistakes reported on practical-machining forums almost always trace back to one of two roots: inadequate surface preparation on the insert, and vendor-specific adhesive systems that do not transfer between suppliers. An r/AskEngineers thread from 2024 captured the reproducibility problem cleanly — when a part runs in two plants, the adhesive chemistry has to be specified on the drawing, not left to the shop floor. For a deeper walk-through, our bond process calculator models primer coverage against surface energy. You can also cross-check compound choice with the elastomer compound selector.
Rubber-to-Metal vs. Rubber-to-Plastic Bonding
Overmolding rubber to metal and overmolding rubber to plastic are often treated as the same problem, but the bond mechanisms are different and so are the failure modes. Metal substrates rely on a chemical primer system — a two-coat primer plus cover-cement stack that creates a covalent interface during cure. Plastic substrates rely on surface energy and mechanical interlock: a PBT or PA with surface energy above about 42 mN/m will bond most elastomers directly, while a polyolefin almost always needs a flame or plasma treatment first.
| Criterion | Metal Substrate | Plastic Substrate |
|---|---|---|
| Surface prep | Grit blast + degrease + primer | Plasma / flame / solvent wipe |
| Bond test | ASTM D429 Method B (peel) | ASTM D429 Method B + lap shear |
| Failure mode | Interfacial delamination | Cohesive pullout in substrate |
| Temperature ceiling | Limited by compound, not metal | Limited by substrate glass transition |
Temperature ceiling is where LSR rewrites the calculation. Polycarbonate softens around 145 °C; HCR compression at 170 °C damages it. LSR injection cures at 120–150 °C, which is usually within the substrate’s safe envelope. That is why a polypropylene-core plus LSR-overmold combination — a geometry recently discussed on r/MechanicalEngineering — runs in production while the same part in HCR does not. LSR is not just a material choice at that point. It is the only path to certain plastic-rubber combinations at scale.
Peel test results from ASTM D429 vary by compound, primer stack, and specimen geometry, which is why we treat any single number as a benchmark rather than a spec. Useful questioning is not “what is typical bond strength?” but “what is the peel value on my compound, my substrate, my primer, at my cure profile?” That number comes from a pre-production bond test, not from a handbook.
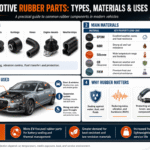
Industrial Applications

Rubber overmolding shows up in every industry that needs rigid structure plus compliant surface. Automotive uses it for engine mounts, anti-vibration bushings, and sealed connectors where a rubber boot has to survive fifteen years of thermal cycling. Medical device manufacturers, along with the broader medical industry, use LSR overmolds for catheter handles, peristaltic pump tubing, and any surface a clinician will grip through a sterile glove — every molded part that touches a patient has to clear ISO 10993 biological evaluation, which LSR grades routinely pass. Consumer electronics uses two-shot rubber-on-plastic for power-tool handles and sealed outdoor gear. Industrial hardware uses it for tool handles, valve diaphragms, and any seal that would otherwise need a separate gasket and a capture feature.
Underneath all of these, the pattern is the same: take a load-bearing substrate, overmold a compliant layer on the contact surface, and ship one part instead of three. One scenario from a power-tool OEM illustrates it cleanly. Their 14 mm hex drill housing originally used a screwed-on rubber grip that warranty claims showed was separating after roughly 18 months of job-site use. Switching to a TPE overmolded grip on the same nylon housing removed the screws, removed the adhesive, and closed out the warranty category in the next model year. End result: the tool was lighter, the line was one assembly station shorter, and the bill of materials dropped by two part numbers — all from the same geometry, different process.
Common Problems with Rubber Overmolding (And How to Fix Them)
Failure modes for rubber overmolds are short in number but unforgiving: bond delamination, flash, short shot, substrate deformation, and primer skip. Among those, interfacial delamination is by a wide margin the defect that shows up in warranty returns rather than line reject bins — because it is the only failure that can pass incoming inspection and still fail in service.
“Bond failure is rarely caused by a singular defect; it is normally the outcome of a cumulative process imbalance. Dependable performance depends on treating each step of the rubber-to-metal bonding process as a measurable, controlled variable.”
— Schilthorn Precision engineering team, ISO 9001 / AS9100 certified manufacturer
What Are the Problems with Overmolding?
The top four field failures, in order of how often they trigger warranty returns: (1) bond delamination from incomplete surface prep — usually a grit-blast profile too shallow or a primer flash-off time too short; (2) flash around gate witness marks — a mold venting issue, not a material issue; (3) short shots in thin-wall corners — fixed by opening the wall to 1.0 mm minimum and relocating the gate; (4) substrate distortion — which happens when a temperature-sensitive insert is run in compression instead of LSR. Each has a known fix, but the fix has to be applied before tooling is released, not after a failed first article.
⚠️ Important
Bond delamination typically shows up during thermal cycling, not at initial inspection. A part that passes the first QC pull test can still fail six thermal cycles later. Any bond qualification protocol should include at least one temperature shock cycle before signoff — not just a room-temperature pull. For the peel-test reference values we use during qualification, see our rubber-to-metal bond strength reference.
Frequently Asked Questions
Q: What is overmolded rubber?
Overmolded rubber is any molded layer of rubber that has been directly molded onto another part (usually a thermoplastic substrate or a metal insert) during the same mold cycle. It bonds to the mold surface through chemical or mechanical means to form a one-piece structure without glue or mechanical fasteners. Overmolding of rubber onto cast metal or thermoplastic is common in the manufacture of grips, seals, vibration dampers, and medical appliance handles.
Q: What thickness is rubber overmold?
For a typical off-the-shelf conventional rubber overmold, the minimum wall thickness usually runs from 0.8 to 1.0 mm; LSR can run as thin as 0.5 mm, due to its light viscosity. Walls thicker than about 6 mm are usually cored out, because solid rubber that thick traps heat during cure. Most cost-effective production overmolds sit between 1.5 to 3 mm to allow for flow, speed, and cooling time.
Q: Can you overmold silicone onto plastic?
Yes. Liquid injection molding of LSR onto thermoplastics such as ABS, PA, PBT, PC, and PPS is a mature process. Thermoplastic substrates are not exposed to extreme heat during LSR cure, which runs at 120 to 150 °C — below the glass transition of most engineering plastics. Surface-energy bonding and mechanical bonding provide the adhesion, optionally assisted by primer or plasma treatment for adhesion strength.
Q: How long does rubber overmold tooling take to build?
Production tooling for a rubber overmold typically runs 6 to 12 weeks from approved CAD to first shots, depending on cavity count and complexity. Compression tooling sits at the short end; multi-cavity LSR injection tooling with cold-deck runners can stretch to 14 weeks. Pre-production prototype tooling in soft steel can be ready in 3 to 5 weeks for design verification.
Q: Does rubber overmolding require primer on metal inserts?
Most of the time, yes. A two-coat primer system (metal primer + cover cement) provides the ASTM D429 peel strength in a dry, axial orientation necessary for automotive and industrial qualification. Some silicone elastomers will bond directly to cleaned stainless steel without primer, but this is uncommon. If the drawing does not call for a primer, plan on one.
A note on the numbers in this article. Cycle times, tooling cost ratios, bond strength ranges, and temperature envelopes vary by compound, mold design, cure profile, and insert geometry. The values here reflect published ASTM methods and common industry practice as of 2026 — they are a starting point, not a spec. Before committing to tooling, request a bond test and a first-article cycle time with your specific compound, substrate, and machine. The cheapest way to find out a design rule does not apply to your part is a pre-production test cut.
Need a DFM review on a rubber overmolded part?
The Engelhardt engineering team runs the 6-Point Overmold Readiness Check on your CAD and returns a quote with process recommendation, compound, and tooling lead time — no charge, no commitment.
References & Sources
- ASTM D429 — Standard Test Methods for Rubber Property: Adhesion to Rigid Substrates — ASTM International
- ASTM D2000 — Standard Classification System for Rubber Products in Automotive Applications — ASTM International
- ISO 37 — Determination of Tensile Stress-Strain Properties of Vulcanized Rubber — International Organization for Standardization
- ISO 10993-1 — Biological Evaluation of Medical Devices — International Organization for Standardization
- NIST Polymers and Complex Fluids Program — U.S. National Institute of Standards and Technology
Related Articles
- Rubber Molding Process Comparison Matrix — Injection vs Compression vs Transfer
- Rubber-to-Metal Bonding Compound Selector
- Rubber Injection Mold Tooling Cost Estimator
- Elastomer Property Comparison for Compression Molding
- Silicone vs Rubber — Which to Specify When
- Custom Rubber Molding Manufacturer — Capabilities Overview
Reviewed by the Engelhardt tooling engineering team — Guangdong Engelhardt Rubber & Plastic Technology (ISO 9001 and IATF 16949 certified). Engelhardt operates 400+ molding machines across compression, injection, transfer, and LSR processes, from prototype through mass production.