Get in Touch with Engelhardt


📐 Quick Specs: Injection Molding Process
- Process Type: High-pressure thermoplastic forming
- Typical Cycle Time: 10–60 seconds (varies by wall thickness)
- Dimensional Tolerance: ±0.005 in (±0.127 mm) standard; ±0.001 in precision
- Mold Cost Range: $3,000–$100,000+ depending on complexity
- Common Materials: PP, ABS, PC, Nylon (PA), HDPE, PET
- Production Volume: 1,000 to 1,000,000+ parts per run
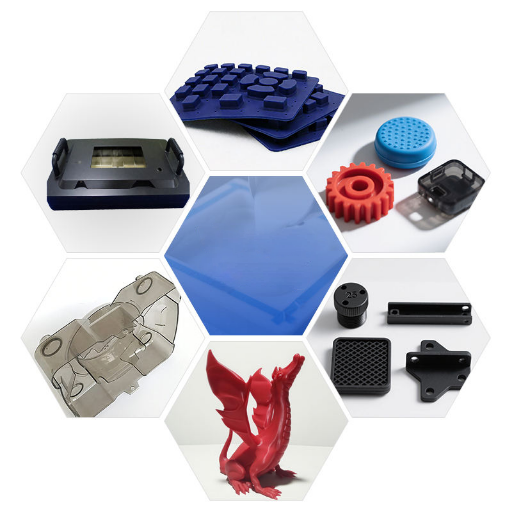
The injection molding process makes up a large percentage of all plastic parts in the world. From the syringe cap in the hospital tray to the dashboard panel inside the vehicle, this manufacturing process takes raw resin pellets and turns it into finished parts through a strict process of heating, injection, ejection and cooling. Understanding how this injection process works — and where it can go wrong — helps engineers and procurement teams make better decisions about material selection, mold design, and production planning. Plastic injection molding is used across nearly every manufacturing sector that requires reliable, cost-effective production of plastic parts at scale.
This handbook presents each step in the development of the injection molding process, summarizes the most widely applied injection molding materials and provides a side by side comparison of specific molding methods, together with a workable design-for-manufacturability checklist based on real production floor experience. Whether you are sourcing your first injection molding program or checking out a new vendor, the data and structure below will provide you with a solid foothold.
What Is Injection Molding — and Why Is It the Most Common Manufacturing Method?
Injection molding is a manufacturing process for making plastic parts by heating thermoplastic or thermoset resin pellets and forcing the molten plastic into a precisely machined mold cavity under high pressure. Once the material sets, the mold opens and the finished part is ejected — ready for use or secondary processing. A full injection cycle typically runs between 10 and 60 seconds, making it one of the fastest methods for producing parts at scale.
$298.7B
Global Market Size (2024)
4.6%
CAGR Through 2029
10–60s
Typical Cycle Time
Source: Grand View Research, 2024 Injection Molding Market Report
For industries such as automotive and medical devices or consumer electronics and packaging, injection molding to produce parts provides tight dimensional tolerances, consistent quality, and little material wastage. This process, cost-effective at high volume, is especially attractive, as the initial tooling costs can be recovered by the use of thousands or perhaps millions of identical items, bringing its per unit cost down to a few cents in the case of large production runs production runs. The modern injection molding machines – known as injection moulding machines in international markets – can be as small as micro units that produce very tiny items or as large as machines with over 3,000 tons of clamping force.
How Does Injection Molding Work?
Plastic injection molding works by heating thermoplastic pellets until they become fluid, then forcing the molten plastic into a steel or aluminum mold under controlled pressure and speed. Once injected, the material fills the mold cavity, cools, and solidifies into the shape defined by the mold. After cooling, the mold opens and the part is expelled, and the injection cycle repeats. What distinguishes commercial plastic injection molding from simpler plastic forming methods is the degree of process control at each step — temperature, injection pressure, cooling rate, and cycle time are all monitored and adjusted to produce parts that meet engineering specifications consistently.
The 6 Steps of the Injection Molding Process
The injection molding process steps follow a predictable pattern that marries efficiency with accuracy. Every step introduces aspects that influence the end quality of the finished part – whether the evenness of the plastic fill of the mold or the cleanliness of its release. Here is how our example product line works on the production line:
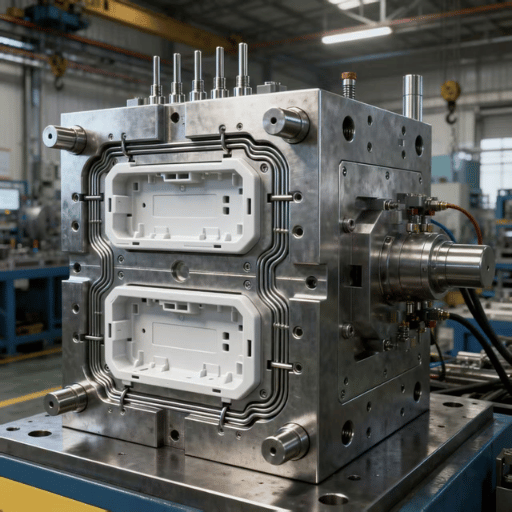
- Clamping. The two halves of the mold are seated in the injection molding machine’s clamping unit, and hydraulic or mechanical pressure put on the mold two halves against the other to relax at enough tonnage to hold off the injection. For a traditional product, clamping tonnage will be between 50 and 500; for large automobile panels, can exceed 2,000. On the factory floor, you can hear the sharp clunk of mold halves locking in place – operators often listen for the consistent sound as an indicator of mold positioning.
- Injection. Plastic pellets flowing from a hopper are heated and plasticized by a reciprocating screw within a heated barrel. Each screw injection shoves the molten plastic through a nozzle into the mold cavity under large injection pressure (typically 10,000 to 30,000 psi). Injection speed and pressure must be perfectly calibrated to the resin and part geometry; fast can create jetting, slow can cause early cooling and short shots.
- Dwelling (Packing). Pack pressure is maintained after the cavity is injected into to compensate for material shrinkage as the plastic cools. This phase is critically important – too little packing pressure can cause sink marks in thicker sections, while too much injection pressure can cause flash down the parting line. During packing, the injection pressure is 50-80% of the initial injection pressure.
- Cooling. In-mold water circulation or other coolant does its best to draw the heat from the solidifying plastic. Heat removal is responsible for 60-80% of the overall cycle time, which makes it the most important element affecting throughput. Uneven solidification from the wall thickness can cause warping or internal stresses, so temperature control and continuous coolant flow matter more than any other single variable.
- Mold Opening. When the plastic has cooled enough, the mold opening sequence is activated to ensure the structural integrity of the finished part as well as minimize damage to features or drag marks on the surface. This standard step can be altered to coordinate with side actions, slides, or lifters that create undercuts in the part.
- Ejection. Air blasts or Ejection pins propel the finished part out of the mold cavity onto either a conveyor or robotic part picker. Once completed, the ejection will trim off any runners, sprues or flash, and it begins all over again. On the factory floor, the whole injection cycle will run as a continuous process, with cycle times possibly coming in at only 10 seconds for a thin-walled part.
💡 Pro Tip: Cycle Time Estimation by Wall Thickness
Thin wall (<1 mm): 5-15 sec | Standard (1-3 mm): 15-40 sec | Thick wall (>3 mm): 40-120 sec. All these estimates assumes normal thermoplastic resin and water-cooled steel tooling. Short cycle times are responsible for the majority of cost-effectiveness in high-volume production runs.
Injection Molding Materials — Selecting the Right Resin for Your Application
Choosing the right injection molding materials is one of the most important decisions in any injection molding project. Every resin you pick defines not only the mechanical performance of the finished part, but also how the mold must be designed, what process parameters are required, and how long each run will take. thermoplastic resins make up most of injection molded parts because they can be melted and re-formed repeatedly, unlike thermoset materials which perform irreversible crosslinking during molding.
| Material | Tensile Strength | Heat Resistance | Shrink Rate | Best Applications |
|---|---|---|---|---|
| Polypropylene (PP) | 31–41 MPa | 100–130 °C | 1.0–2.5% | Packaging, living hinges, food containers |
| ABS | 40–50 MPa | 80–100 °C | 0.4–0.7% | Electronic housings, appliance panels, consumer goods |
| Polycarbonate (PC) | 55–75 MPa | 120–140 °C | 0.5–0.7% | Safety lenses, medical devices, structural enclosures |
| Nylon (PA6/PA66) | 70–85 MPa | 180–260 °C | 0.8–1.5% | Gears, bearings, under-hood automotive parts |
| HDPE | 26–33 MPa | 80–120 °C | 1.5–4.0% | Containers, caps, piping systems |
| PET | 55–80 MPa | 70–120 °C | 0.2–0.5% | Bottles, packaging, electrical connectors |
Values are typical ranges from material datasheets. Actual performance depends on grade, filler, and processing condition.
Material Selection Decision Guide
- If food-contact regulatory issue PP or HDPE (FDA-compliant grades available)
- If structural load-bearing Nylon (PA) or PC (high tensile strength + stiffness)
- If cost is in average consideration PP or ABS (lowest material cost per kg)
- If high heat exposure PET or PC (sustained temperature performance)
- If optical transparency is needed PC or PMMA (transparent grades)
⚠️ Common Mistake
Selecting a plastic resin based solely on unit cost without checking its shrink rate for your specific geometry. A cheaper resin with a 2.5% shrink rate may require tighter mold tolerances and longer cooling time – erasing the cost advantage. Request a material datasheet and verify the shrink rate with your part design before selecting a resin for production.
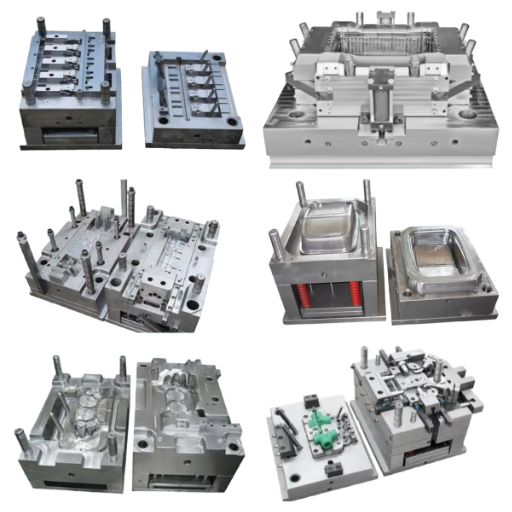
Types of Injection Molding Techniques
Standard thermoplastic injection molding constitutes the great majority of global production, but there are several highly-specialized injection molding techniques that are useful for multi-material parts, hollow sections, or components so tiny that the mold cavity can barely contain them. All methods work differently in filling the mold cavity or bringing together more than one material – and all have specific cost, tooling, and design implications.
| Technique | Best For | Typical Volume | Key Limitation |
|---|---|---|---|
| Standard Injection Molding | Single-material, solid parts | 1,000–1,000,000+ | Limited to single material per shot |
| Insert Molding | Metal-plastic hybrid parts (connectors, threaded inserts) | 5,000–500,000 | Manual insert placement slows cycle time |
| Overmolding | Multi-material parts (soft grip over hard base) | 10,000–500,000 | Requires two-shot mold or secondary operation |
| Gas-Assisted Injection | Hollow channels, thick sections without sink marks | 5,000–200,000 | Higher tooling cost + gas control equipment |
| Micro Injection Molding | Extremely small parts (medical, micro-electronics) | 10,000–1,000,000 | Requires specialized molding equipment and tooling |
| Compression Molding | Thermosets, large flat parts, rubber | 500–50,000 | Slower cycle times; limited geometry complexity |
As summarized by a report published by the National Institutes of Health (PMC), innovations in injection molding, such as gas-assisted injection, micro injection molding, and multiple material methods have increased in popularity with medical and automotive manufacturers, while standard injection molding still accounts for the majority of global plastic part production.
⚠️ Don’t Confuse Overmolding with Insert Molding
Both involve multiple materials, but the insert molding process uses a pre-molded part (fillet usually metallic) in the mold before injection, whereas overmolding places a second material over an already-molded plastic substrate. Each molding process presents different tooling requirements, cycle times, and part design limitations.
Common Injection Molding Defects and How to Prevent Them

No injection molding process runs defect-free forever. Even the most carefully engineered production facilities run into issues when materials, tooling, or process condition drift out of their target range. How quickly operators determine the issue’s root cause—and whether the part design gave them enough room to troubleshoot—is what determines whether a production line has a high or low scrap rate.
Are Injection Molding Defects Common?
Defects are introduced in almost every injection molding operation, particularly during the initial set-up and process validation stages. The typical defect – sink marks, warping, and short shots are all caused by virtually identical origins: inconsistent wall thickness and cooling. One veteran plastics engineer commented on a popular engineering hub “[f]or the mold, all defects are so heavily dependent on the mold design, the wall thickness, and the process parameters that generic troubleshooting guides are nearly useless without an intimate understanding of the specific part.” The injection molding process ensures quality only when every variable is controlled in concert.
⚠️ Critical Defects to Watch
- Sink marks: Indentations appearing on thick sections due to high injection speed or low packing pressure during cooling
- Warping: Uneven cooling rate or uneven wall thickness can cause warping of the shape.
- Shortshots: mold does not fully fill from lack of injection pressure, poor venting or viscosity problem of material.
- Flash: Extra material that protrudes from the parting line when clamping pressure is too low or mold surfaces are deteriorated
- Weld lines: Appears as surface marks of fusion regions of two melt fronts. Weakening of bond strength at the weaker weld point.
wall thickness inconsistency and uneven cooling cause both sink mark and warping. Ninety percent of the cosmetic problems we fix originate from part design decisions, all made before mold was cut.
- Need to keep consistent the wall thickness through the part (target 10% of nominal)
- Design appropriate draft angles for clean ejection (min 1 per side)
- Define correct gate placement to keep cavity filling symmetry.
- Check cooling channels design for heat distribution
- Create material specific drying cycle (before molding) (section for example: Nylon, PC, ABS)
Defect prevention starts before the mold is ever built. From experience, the most effective approach is to address those features (wall thickness, draft angles, gate location) at part design; not as a secondary feature during production of complex parts. As reported by the National Library of Medicine, the important variables that affect the presence or absence of defects in injection moulded parts are melt temperature, mold temperature, injection screw speed, packing pressure, and cooling time.
Design Guidelines That Reduce Cost and Improve Part Quality
Good part design makes the injection molding process faster, cheaper, and more reliable. Poor part design creates expensive problems — from mold rework and long cycle times to chronic defect issues that persist through every production run. Our guidelines below reflect what actually matters on the production floor when translating a CAD model into a moldable, cost-effective plastic part.
The 3-Question DFM FilterBefore sending any part design to a mold shop, run it through three questions:
- Is every wall within ±10% of nominal thickness? Non-uniform walls cause sink marks, warping, and unpredictable shrinkage.
- Can the part release from the mold without side actions? Every side action adds $2,000–$10,000+ to mold cost and increases cycle time.
- Is the tightest tolerance actually functional? Specifying ±0.001 in where ±0.005 in would suffice can increase mold cost by 30–50%.
If you answered “no” to any of these questions, come back to us BEFORE you start getting quotes. Qualified mold engineers say this is where many projects overshoot their budgets in injection molding.
- Wall thickness: Maintain consistent wall thickness: 1.5-3.0 mm wall thickness for most thermoplastics
- Draft angles: Use minimum 1 per side; textured surfaces require 1.5-3
- Ribs: Ribs one half the thickness of the thermoplastic may be used to avoid sink marks on the opposite side of the part
- Bosses: Inner diameter 60% of outer diameter; add gussets for additional strength
- Undercuts: Remove when possible; each one adds
- Gate locations: Place gates on the thickest part of the thermoplastic to ensure the best material flow and packing
- Internal radi: Add radi at all sharp angles; a minimum of 0.5 mm radi will yield increased flow and less stress concentrations
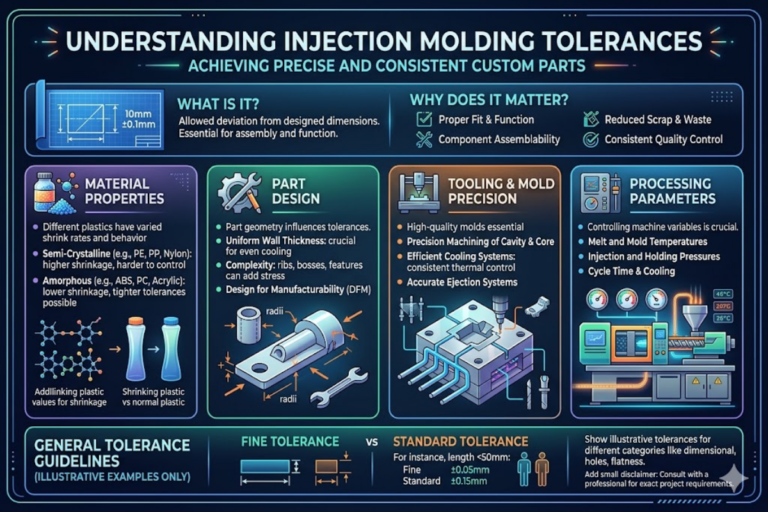
- Tolerances: Use 0.005 in (0.127 mm) as a standard; reserve tight tolerances for functional interfaces only
It is the design efforts to removes complexities needlessly introduced to tools that most influence costs in an injection molding project. Forums filled with seasoned mechanical engineers raved about shearing away thick walls or blocking side-action features – techniques that can deliver 20-40% cost savings to injection molding projects before any part is made.
Would you like to confirm your part design is meeting industry benchmark injection molding tolerances? Check critical dimensions with our interactive calculator before you request tooling quotes. To get a rudimentary ball-park estimate of injection molding costs, try our injection molding cost estimator.
📐 Engineering Note
As an industry rule of thumb for thermoplastics, a standard achievable tolerancing of 0.005 in/in (0.127 mm/25 mm) is typical. For higher precision molding, a hardened P20 or H13 mold can reach 0.001 in (0.025 mm) on topographically critical features but tooling costs escalate. Always confirm the exact tolerances that are possible with your mold manufacturer for your combination of resin and geometry.
Frequently Asked Questions
Q: How much does injection molding cost?
View Answer
Mold tooling costs can vary from $3,000 for aluminum prototypings with simple single cavity to $100,000+ for multi cavity hardened steel production molds. Cost per part will vary depending on volume, material, and cycle time – large production runs can get costs per part below $0.10. Use our injection molding cost estimator for a project-specific estimate.
Q: Is injection molding good for mass production?
View Answer
Yes. Injection molding is by far the easiest solution to put plastic parts into mass production, because the speed of polypropylene injection (as fast as 10 sec) can support thousands of identical parts produced from one mold. Although initial tooling costs are high, the per unit costs fall as the volume climbs, so injection molding provides the least expensive way of getting high volumes to market.
Q: What industries use plastic injection molding?
View Answer
Automotive, medical, consumer electronics, packaging, aerospace, and construction. Automotive and packaging consume the largest volumes globally.
Q: What is the difference between injection molding and compression molding?
View Answer
injection molding forces molten plastic into closed mold cavity under high pressure creating complex part geometries with short cycle times and tight tolerance limits. Compression molding loads pre-measured material into open mold, then shuts it under heat and pressure- more appropriate to thermoset material, large flat parts and rubber compression molding processes where flow material requirements are less demanding.
Q: How long does injection molding take?
View Answer
One injection molding cycle ranges from 10-120 seconds depending part size, wall thickness, material and mold complexity. Thin walled parts production in fast-cycling molds may run as quickly as 15 seconds, whereas technical assemblies with heavy walls may have a 60+ second mold cooling time alone.
Q: What are the disadvantages of plastic injection molding?
View Answer
Drawbacks include high initial mold tooling costs ($3,000-$100,000+), long lead times for mold fabrication (4-16 weeks), and a limited selection of materials for certain specialty applications. Any mold design changes after production tooling is cut can cost thousands of dollars and require scheduling delays of several weeks. The process also generates some material waste through runners and sprues, though most of this can be reground and reused. For low-volume projects under 500 units, 3D printing or CNC machining typically offers better per-part economics than injection molding. The environmental footprint of plastic waste also remains a concern, particularly when non-recyclable resins are specified.
Ready to Start Your Injection Molding Project?
Engelhardt manufactures 700+ injection molding machines – from tiny precision units to 2,000-ton presses – working with ISO 9001 and IATF 16949 approved quality systems. Our engineering team controls all aspects from prototype tooling to high volume production runs.
About This Analysis
This data sheet was authored by the engineering content team at Engelhardt, a global manufacturer of injection molding, rubber compression molding and precision component production lines from a 26,000 square meter facility in Zhongshan, China. Our process factors, DFM recommendations and defect reduction tips are drawn from direct experience of operating over 700 injection machines with daily consumption of more than 100 tons of material. When referencing other sources, the inline citation can be seen below.
References & Sources
- Injection Molding Market Size, Share | Industry Report, 2033 — Grand View Research
- Experimental Development of an Injection Molding Process Window — National Library of Medicine (PMC)
- Advanced Injection Molding Methods: Review — National Library of Medicine (PMC)
- Multiple Objectives Optimization of Injection-Moulding Process — National Library of Medicine (PMC)
- Injection Moulding Process — Engineering Topics Overview — ScienceDirect / Elsevier
- 9 Mistakes to Avoid When Designing Injection Molded Parts — Protolabs
Related Articles
- Plastic Injection Molding Services — Full capabilities overview
- Custom Rubber Molding — Compression, transfer, and injection methods
- Rubber Compression Molding Guide — Process, tolerances, and cost comparison
- Rubber Injection Molding Guide — Process, materials, and design rules